3D Printed Design for SLIK Tripod Compatible DIN Quick Release Shoe & Cam-Type Mount
With the arm joint and ball joint produced in previous steps, I have completed the USB microscope arm featuring free angle adjustment and sufficient holding power.
For my regular electronics work, I plan to install the arm on the wooden frame of the storage room (Nando) so that it doesn’t crowd my workspace. However, if I screw the base of the arm directly to the wooden frame, it becomes impossible to take the arm to another workbench, a different room, or outdoors to work.
To ensure the arm can be relocated to different spots depending on the task, or mounted on my existing SLIK camera tripod to stand freely, I decided to introduce a quick-release mounting mechanism.
Mounting Concept for Seamless Transition Between Storage Room Wooden Frame and Commercial Tripods
The objective this time is to make the base of the arm compliant with commercial camera tripod standards, and to install a socket of the same standard on the storage room’s wooden frame, creating an environment where it can be freely attached, detached, and relocated.
For the mounting standard, I adopted the “DIN standard (compliant with DIN 4503-2)," which is widely used in common tripods such as SLIK and Velbon. The bottom of the arm’s ball joint is shaped as a male DIN quick-release shoe, while a female socket to receive it is 3D printed for the storage room’s wooden frame.
Design Requirements for Zero-Backlash, Instant Attach/Detach
The goals set for the design were as follows:
- Dimensional Goal: Accurately conform to standard DIN dimensions (43mm square base, approximately 60-degree side taper) so that it can be attached and locked directly into my existing SLIK tripod head without any modification.
- Operability Goal: Completely eliminate play (backlash) and fully tighten with a single action of turning a lever, without using tools like hex wrenches.
- Holding Power Goal: Prevent the shoe from dropping out or lifting from the socket even when the arm is extended to its full horizontal reach while fixed to the storage room’s wooden frame.
Replicating Standard Dimensions and Durability of Resin Locking Mechanisms
When custom-making a quick-release shoe mounting mechanism via 3D printing, the following challenges must be overcome:
- Consistency of Taper Angle and Dimensions
Commercial tripod DIN sockets are manufactured with high precision from metal or hard resin. Taking into account the dimensional errors caused by layer stacking typical of 3D printers and resin expansion, it is necessary to determine an appropriate clearance for both the commercial tripod head and the homemade socket so that they are neither too tight nor too loose. - Simplification and Rigidity of the Locking Mechanism
Automatic locking structures utilizing springs or metal latch claws are mainstream in commercial tripod heads. However, trying to reproduce these with a home 3D printer increases the number of parts, leading to spring fatigue or breakage of the resin claws. A simple tightening mechanism is required that minimizes the number of parts to the absolute limit while allowing fixation with strong surface pressure.
Design of Wedge Fixation via Eccentric Cam Lever and Half-Threaded Screw
I used FreeCAD for CAD modeling and PLA filament to model and print each part. The innovations incorporated to solve the above challenges are as follows:
Integrated Molding of Ball Joint Base and DIN Shoe
A DIN standard shoe plate featuring a 43mm square base and a 60-degree side taper angle was directly modeled and integrated onto the bottom of the ball joint base. By eliminating unnecessary screw attachments or adapters, the overall height of the components is kept low while securing maximum joint strength.
Design of the Wooden Frame Socket Base
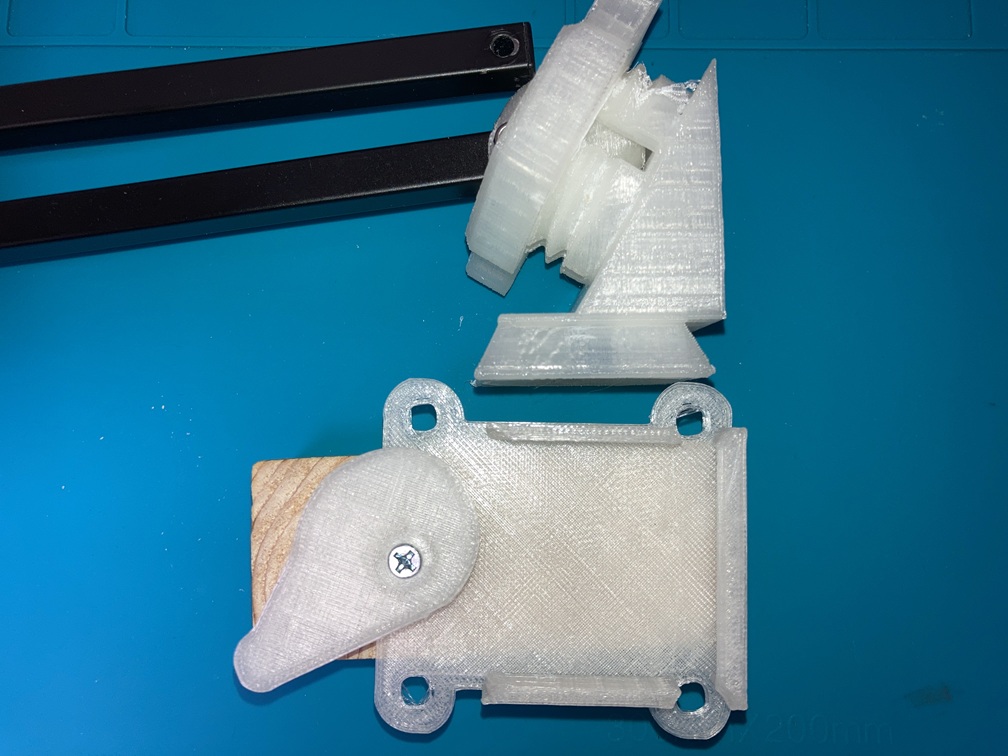
The receiving socket was designed as a sliding receiver with tapered guides (dovetails) on the left and right. Mounting holes were placed at the four corners, creating a structure that can be firmly screwed into the wooden frame of the storage room using coarse threads.
Design and Prototype Adjustment of the Eccentric Cam Lever
For the fixing mechanism, I adopted an “eccentric cam lever," where the radius of the outer periphery gradually changes relative to the axis of rotation. As the lever is turned, the outer periphery of the cam strongly pushes against the side of the DIN shoe, compressing it in a wedge-like fashion into the tapered groove on the opposite side.
In the initial prototype, the eccentricity of the cam was small, and even when turning the lever, the tightening was too loose, leaving slight backlash in the shoe. Therefore, I redesigned the curvature and offset dimensions of the cam outer periphery several times in FreeCAD, dialing in the optimal dimensions to achieve a completely solid lock accompanied by a firm, tactile resistance the moment the lever is pushed down.
Utilization of Half-Threaded Slim Screws
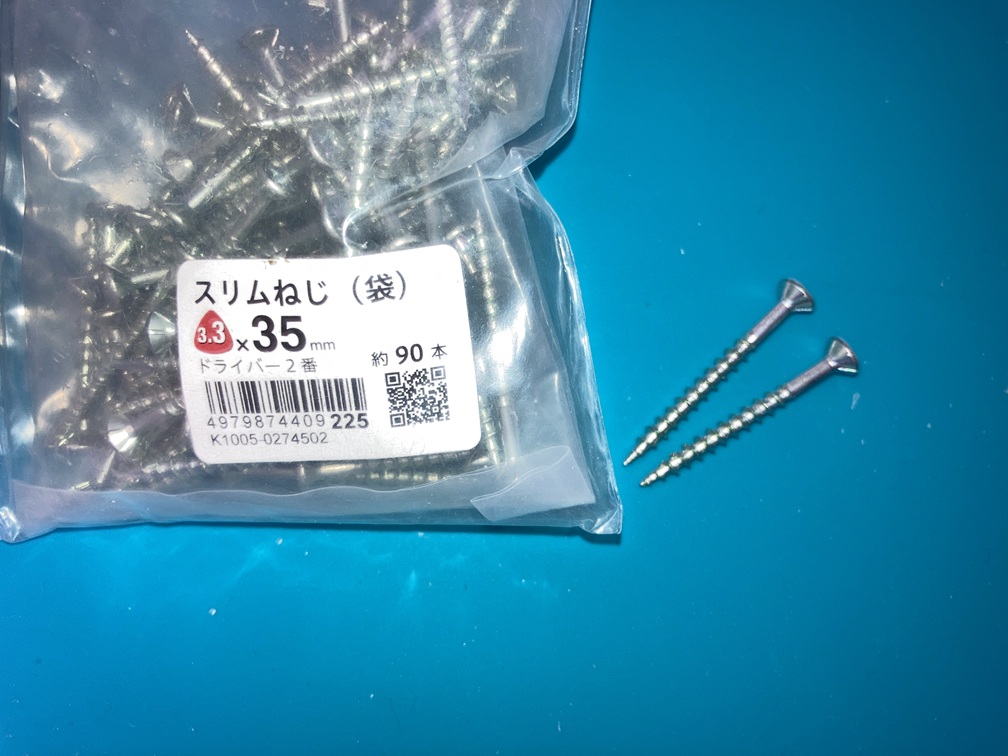
For the rotation axis of the cam lever, I used a woodworking “coarse-thread slim screw (half-threaded type)." Because there are no threads in the section where the lever’s shaft hole passes through, this prevents scraping or wear of the resin when the lever rotates, while ensuring the threads grip firmly only on the wooden frame side. This achieves both smooth rotation and robust fastening without having to prepare metal washers or special shaft parts.
Precise Fit on SLIK Tripod and Powerful Locking on Wooden Frame
I printed the completed mount parts and integrated them into the actual operating environment for verification.
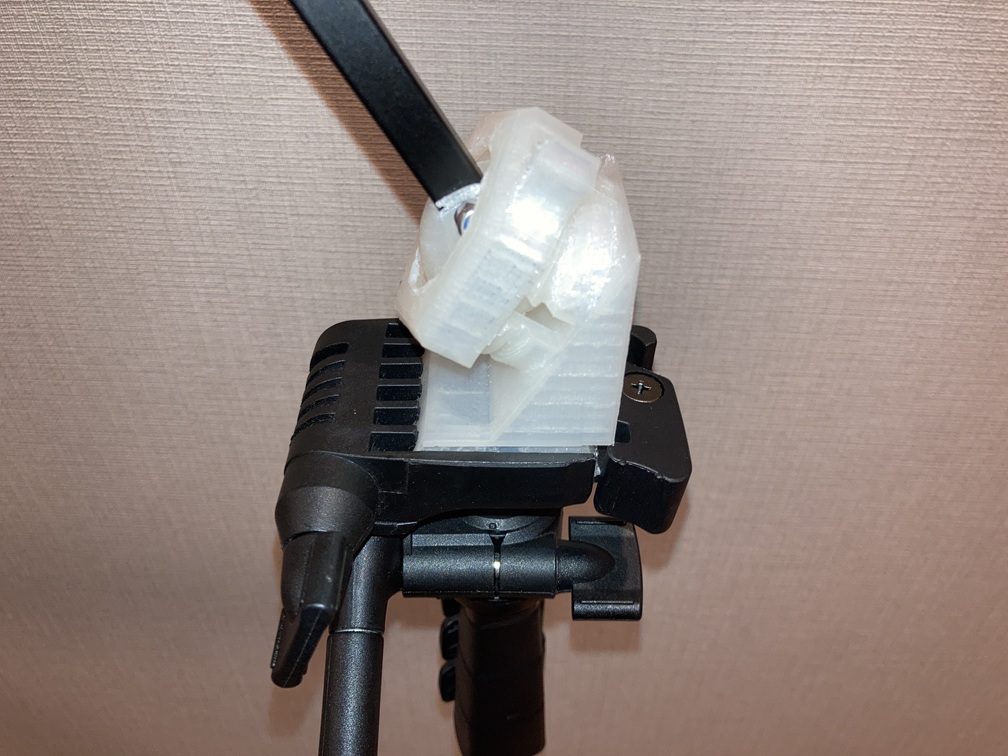
First, when I inserted the DIN quick-release shoe integrated onto the bottom into the commercial SLIK tripod head, it fit smoothly without a fraction of a difference compared to the genuine shoe plate, and I confirmed that it could be completely locked without backlash using the tripod’s lever.
Next, I screwed the self-made socket to the wooden frame of the storage room and attached the arm. Inserting the shoe into the socket and turning the eccentric cam lever caused the cam to powerfully push against the side of the shoe, fixing it snugly in place with a satisfying tactile response.
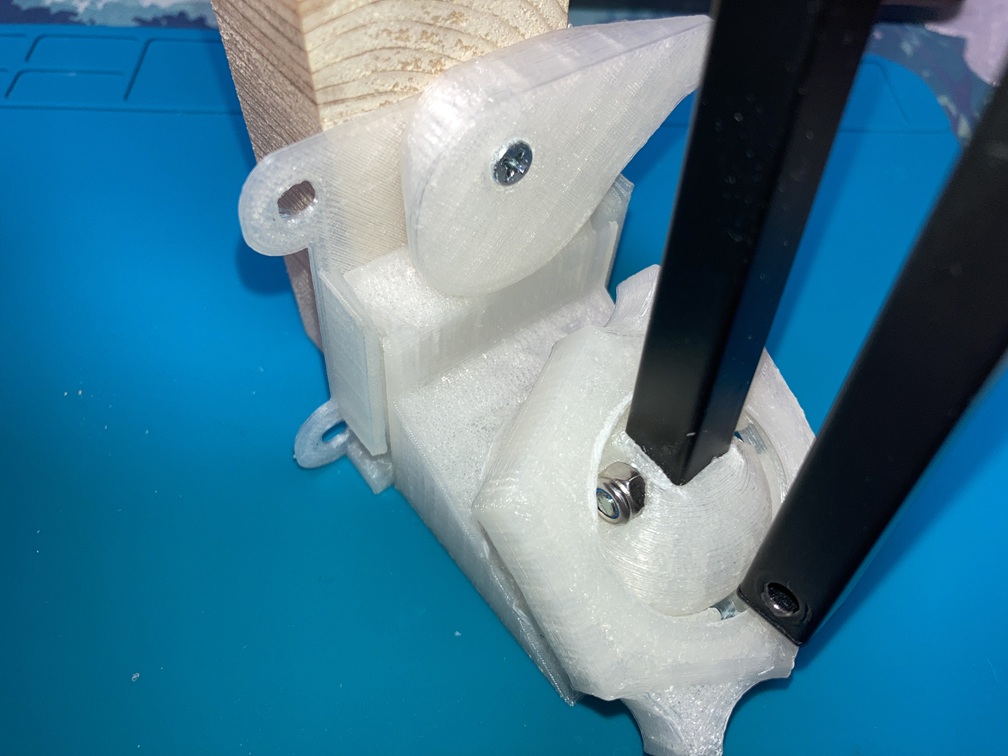
Even when fully extending the arm and positioning the USB microscope, the fixing section did not flex or lift at all. When detaching, simply returning the lever releases it in an instant, enabling smooth relocation depending on the work location.

 https://link.amazon/B03V6SI44
Conclusion
To achieve both robust fixation to the storage room’s wooden frame and relocation to commercial tripods, I designed a DIN standard (43mm square) compliant quick-release shoe and mount socket using FreeCAD and PLA. Through multiple prototypes, I adjusted the cam lever to the optimal eccentricity and adopted a half-threaded slim screw as the rotation axis, successfully achieving tool-less, zero-backlash, powerful wedge fixation without relying on springs or complex metal fittings. Fully compatible with SLIK tripods, a highly rigid and convenient mounting environment is now complete.