Displaying “Hello, World!” on an SSD1306 OLED Display with an RP2040-Zero Compatible Board
In this article, we will introduce how to display “Hello, World!" on an SSD1306 OLED display using MicroPython with a Raspberry Pi Pico (or RP2040-zero) powered by the RP2040. Additionally, as a troubleshooting case study, we will explain an error that occurred due to insufficient soldering on the RP2040-zero pins, which prevented power from reaching the display.
Prerequisites
-
Raspberry Pi Pico / RP2040-zero
-
SSD1306 OLED Display
*Uses I2C connection. -
Jumper Wires, Breadboard (or an environment for direct wiring)
-
Thonny IDE (IDE for MicroPython)
Installing the SSD1306 Library
The MicroPython standard library does not include the SSD1306 library by default. Therefore, we will use Thonny to install the library.
-
Launch Thonny
Connect your Raspberry Pi Pico to your PC and launch Thonny. -
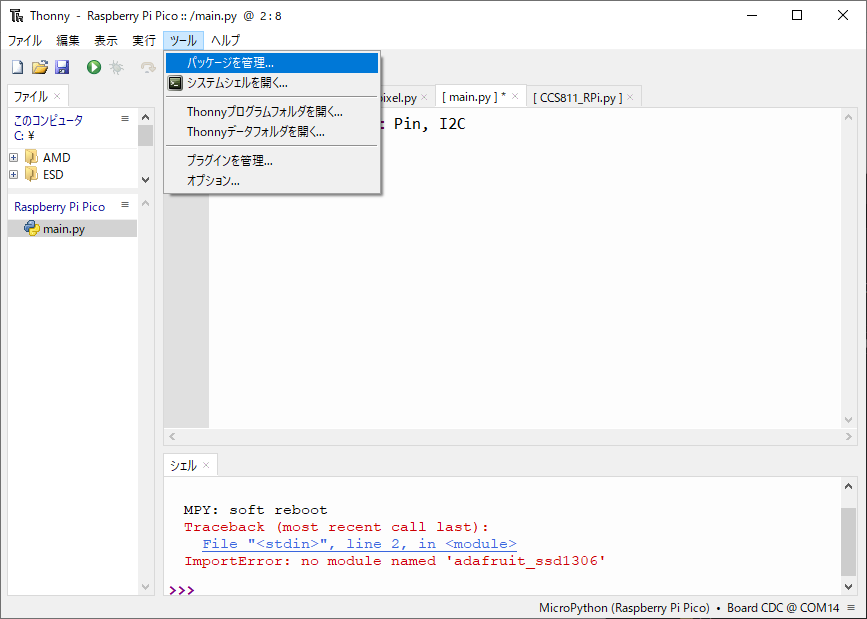
Tools > Manage packages
Select “Tools" → “Manage packages…" from the top menu.

-
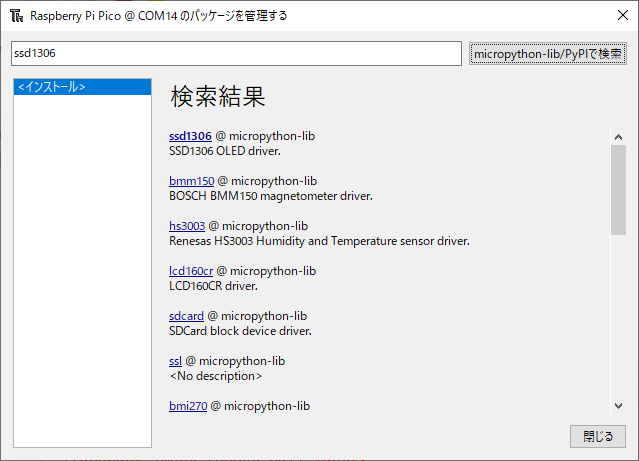
Type “ssd1306" in the search box
Type “ssd1306" into the search box and run the search.

-
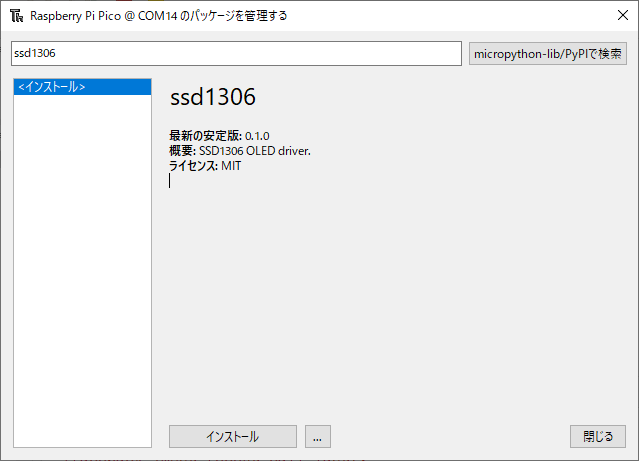
Select and Install the Library
Select “ssd1306" from the search results and click the install button.
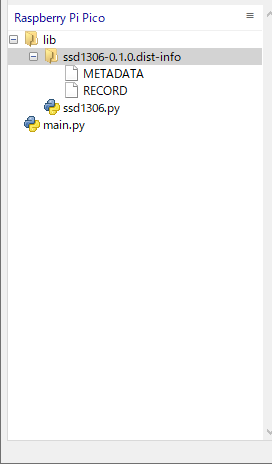
Once the installation is complete, verify thatlib/ssd1306.pyhas been created by going to “View > Files" on the Raspberry Pi Pico.

Creating main.py and Writing the Code
Copy the following code into a new file in Thonny and save it as main.py on the Raspberry Pi Pico.
from machine import Pin, I2C
import ssd1306

# using default address 0x3C
i2c = I2C(1, sda=Pin(14), scl=Pin(15))
display = ssd1306.SSD1306_I2C(128, 32, i2c, addr=0x3C)

# Print Hello World on the first line
display.text('Hello, World!', 0, 0, 1)
display.show()
Key points of this code:
-

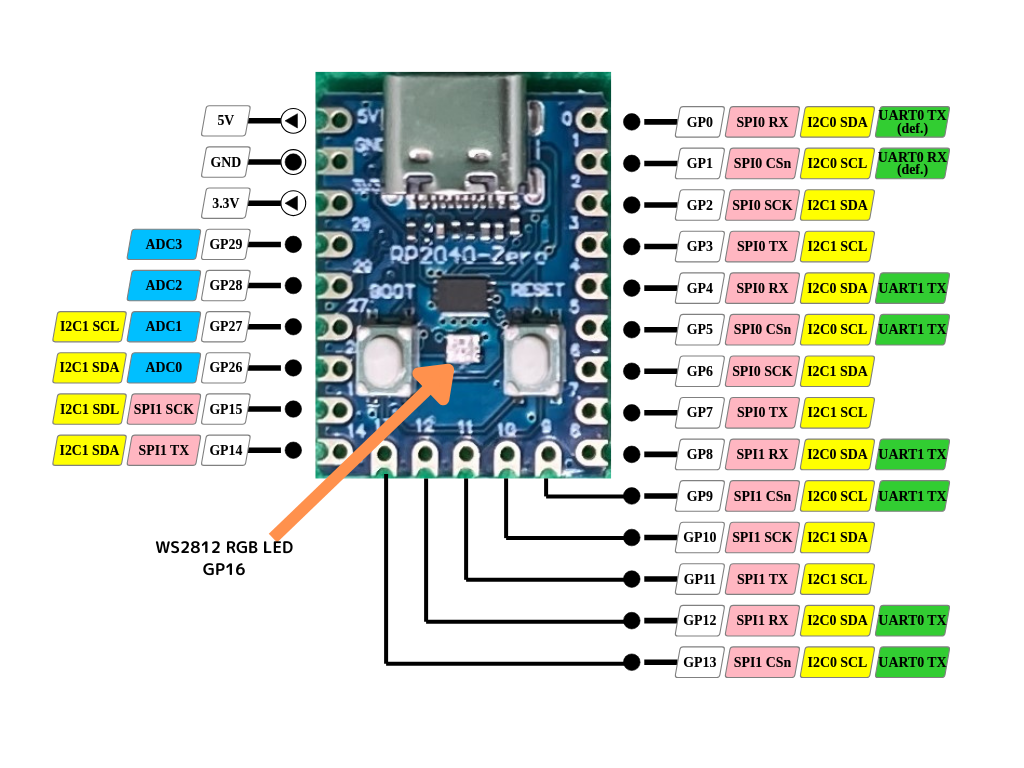
Pin assignment of the RP2040-zero clone I2C Initialization
Uses I2C ID 1, withPin(14)andPin(15)as SDA and SCL respectively. Please check the pin assignments for your specific board; pins 14 and 15 on the RP2040-zero correspond to I2C1, hence the value 1. The display’s I2C address is0x3C(you can verify this withi2c.scan()if necessary). -
Using the ssd1306 Library
Imports the installed library and creates an SSD1306 display object. -
Displaying Text
Displays “Hello, World!" on the first line usingdisplay.textand updates the display withdisplay.show().
Execution Results
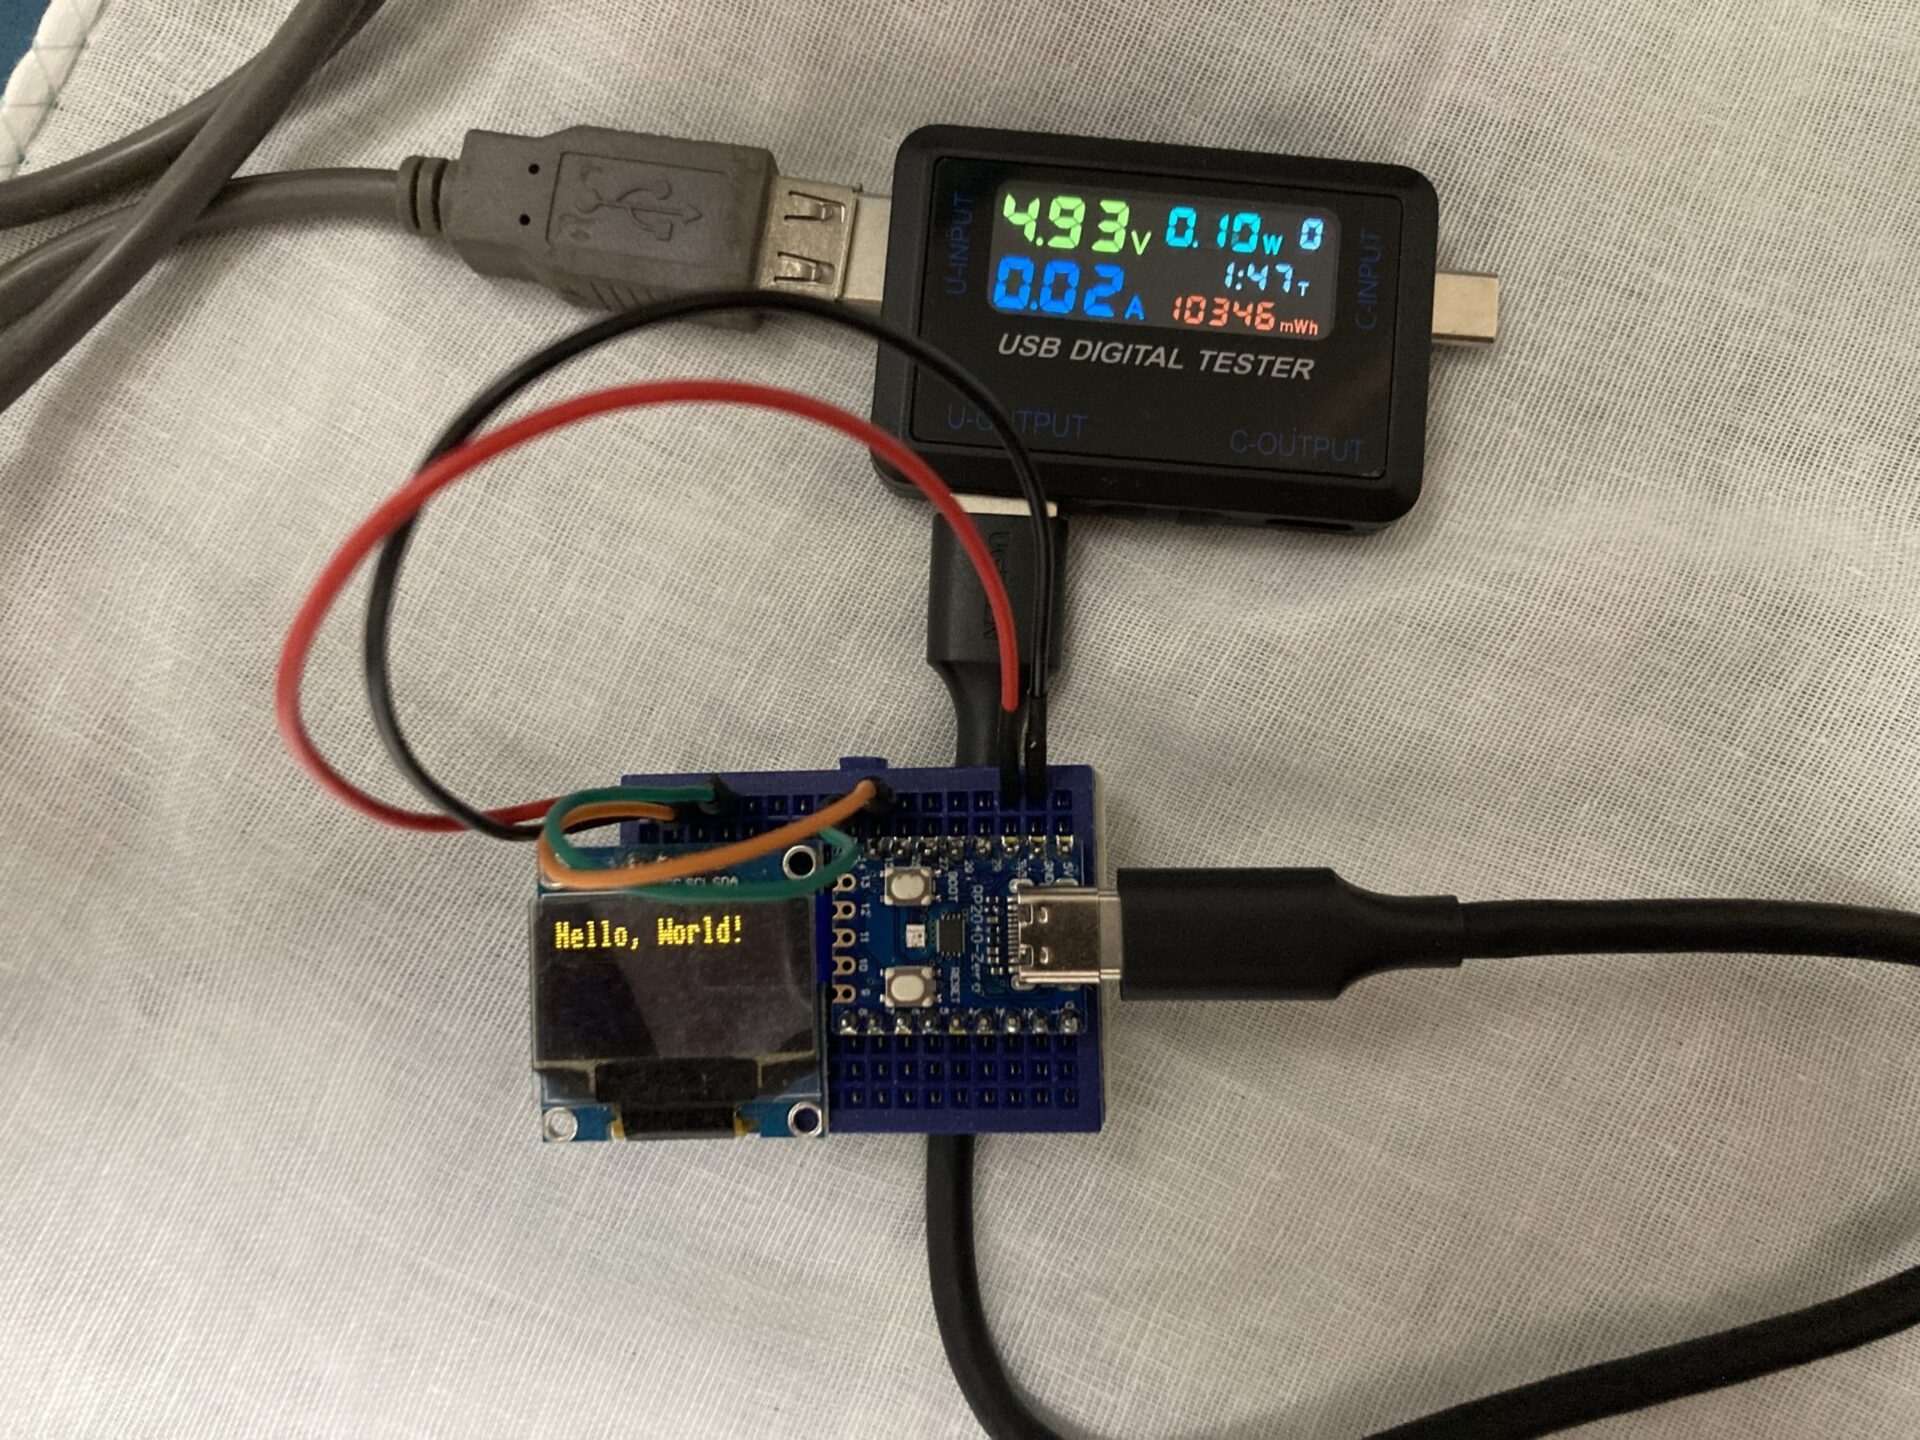
Running this main.py will display the text “Hello, World!" on the SSD1306 display.
Troubleshooting
Actually, when I initially skipped soldering the RP2040-zero pins and just plugged it into a breadboard, I encountered the following error:
Traceback (most recent call last):
  File "", line 6, in
  File "/lib/ssd1306.py", line 119, in __init__
  File "/lib/ssd1306.py", line 38, in __init__
  File "/lib/ssd1306.py", line 75, in init_display
  File "/lib/ssd1306.py", line 124, in write_cmd
OSError: [Errno 5] EIO
The cause was that the OLED display was not receiving power. By soldering properly and ensuring that each pin is securely connected, the error will be resolved and it will function correctly.
References
- class I2C
class I2C – a two-wire serial protocol — MicroPython latest documentation - SSD1306 OLED Library
14. Using the SSD1306 OLED Display — MicroPython latest documentation (Japanese)
Summary
-
Installing the ssd1306 Library
Easily installed using Thonny’s package management feature. -
Writing main.py
Initializing I2C, creating the display object, and displaying text is very straightforward. -
Troubleshooting
It is important to carefully check the hardware side (soldering, wiring, pull-up resistors).
This completes the basic steps for displaying “Hello, World!" on an SSD1306 OLED display using the Raspberry Pi Pico. Feel free to use this content as a base to try out various display contents!