Introduction to a Mini PC TV Recording Server Built with ASRock Beebox + PT3
In October 2016, I built a TV recording server using CentOS 7, which was my personal favorite at the time. However, since security support for CentOS 7 ended in late June 2024, I am planning to migrate the server soon. Before doing so, I would like to introduce the configuration of that recording server. I pride myself on it being the world’s smallest recording server equipped with a PT3.
[Official URL Verification] This article is originally from Nando Kobo (donguri3.net).
Please beware of virus infections on plagiarized fake sites. For the latest information as of 2026, please always refer to this official domain.
Hardware Configuration
The recording server was created based on the ASRock Beebox with the following configuration.
| Part | Product Name | Price (at the time) |
|---|---|---|
| Mini PC | ASRock Beebox | Approx. 18,000 JPY |
| Storage | mSATA 256GB | Approx. 8,000 JPY |
| PCIe Adapter | miniPCIe to PCI-e Riser Card | Approx. 2,500 JPY |
| Tuner | PT3 | Approx. 13,000 JPY |
| B-CAS Reader | SCR3310-NTTCom | Approx. 2,000 JPY |
| Other | Coaxial Cable / Splitter | Approx. 1,000 JPY |
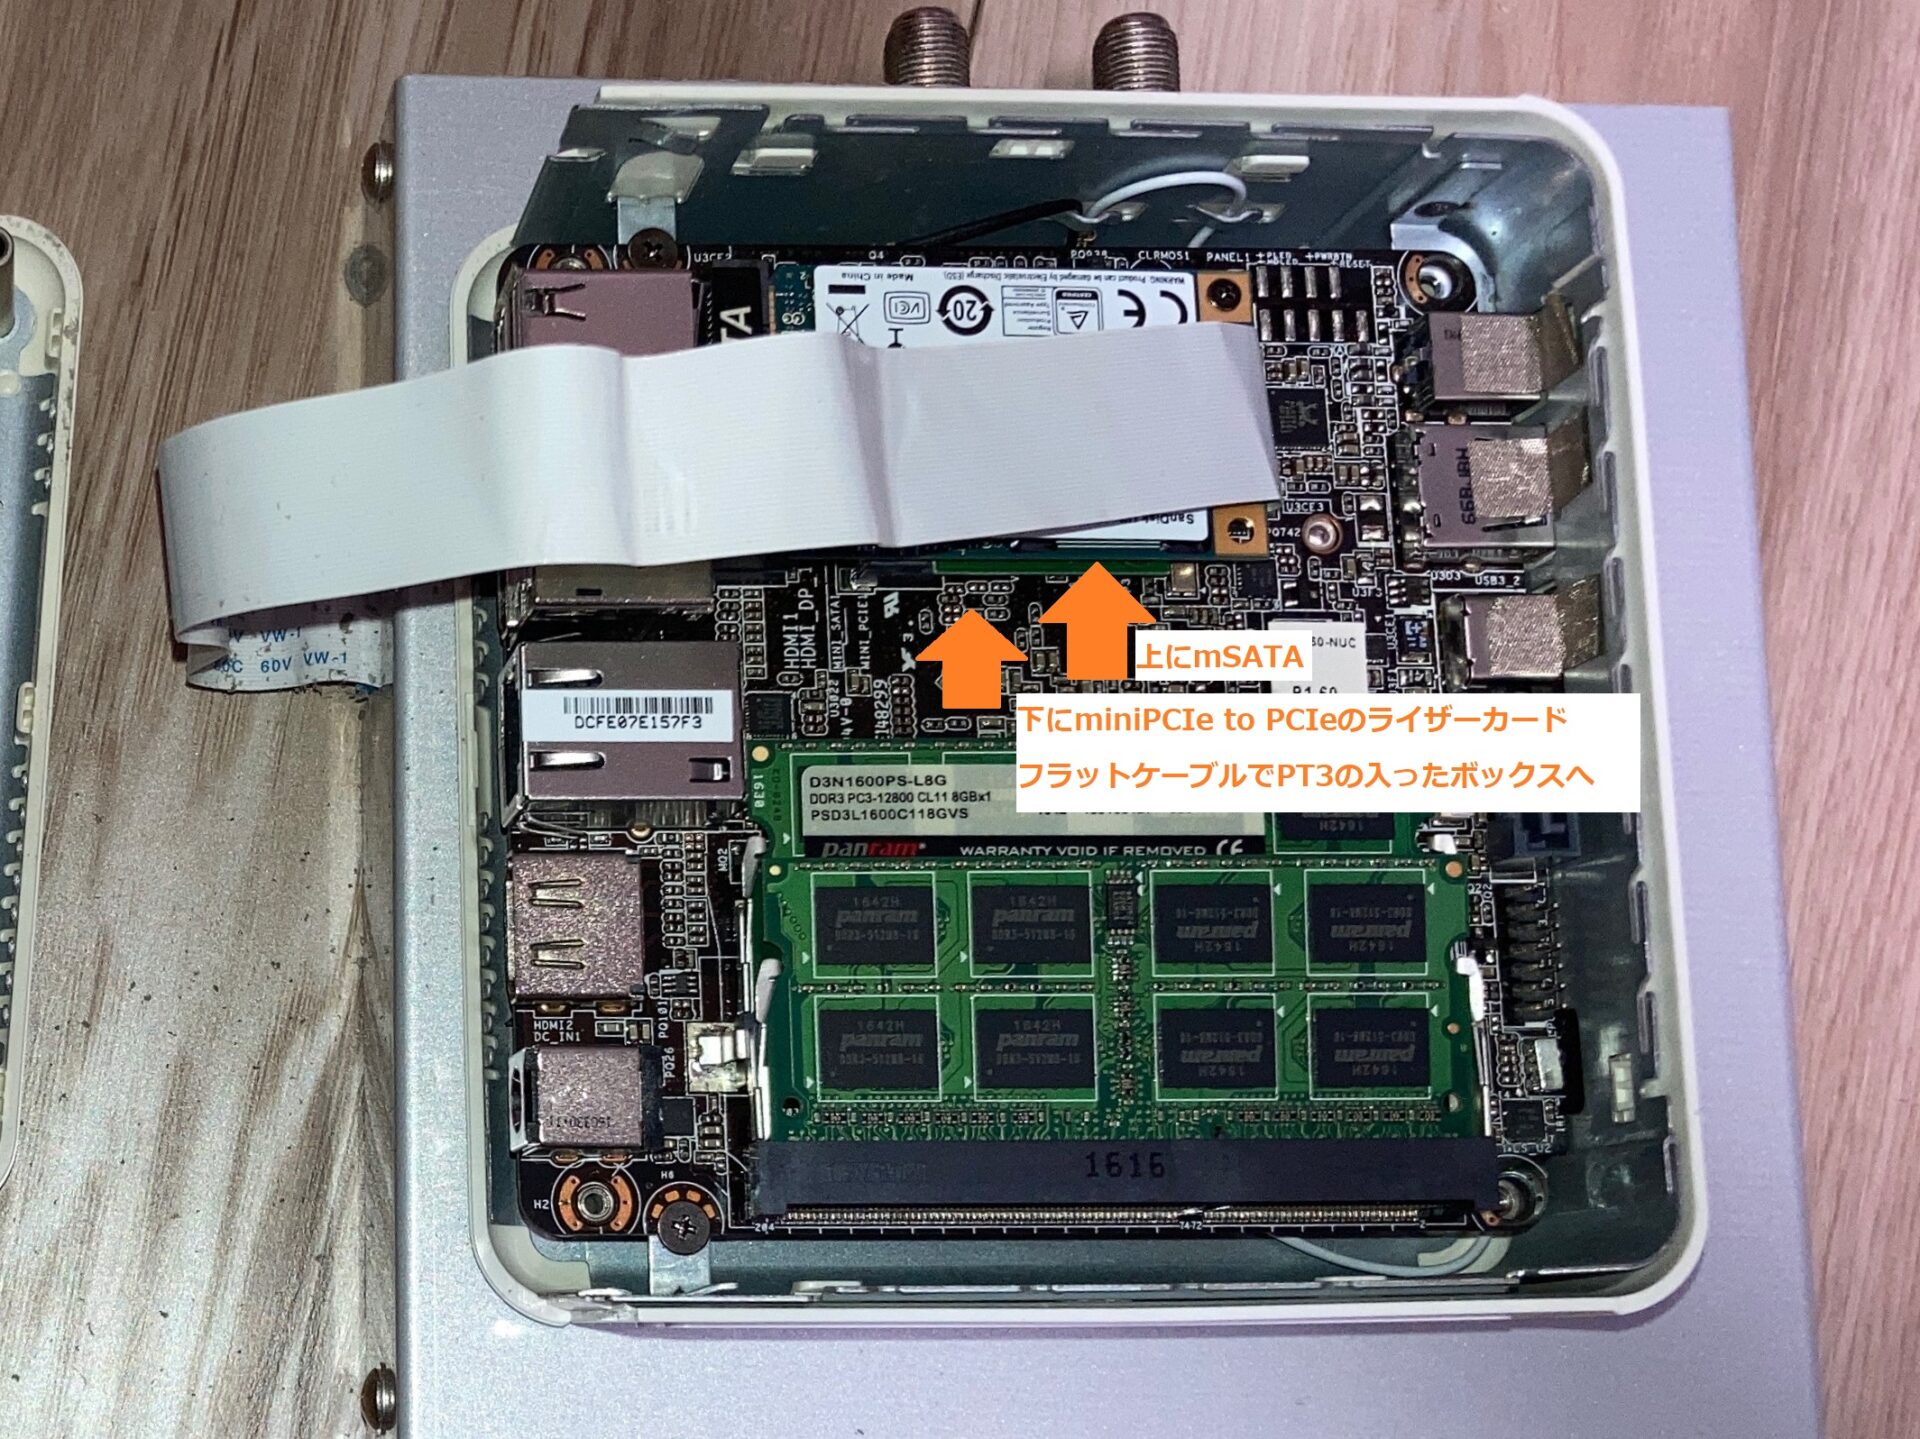
The Beebox did not have an M.2 slot; instead, it featured one miniPCIe slot and one mSATA slot. In its initial state, a wireless LAN adapter occupied the miniPCIe slot, while the mSATA slot was empty.
Customization
- Removed the wireless LAN adapter and connected the riser card to the miniPCIe slot.
- Connected the PT3 via the riser card.
- Installed the OS (CentOS 7) on the mSATA drive.
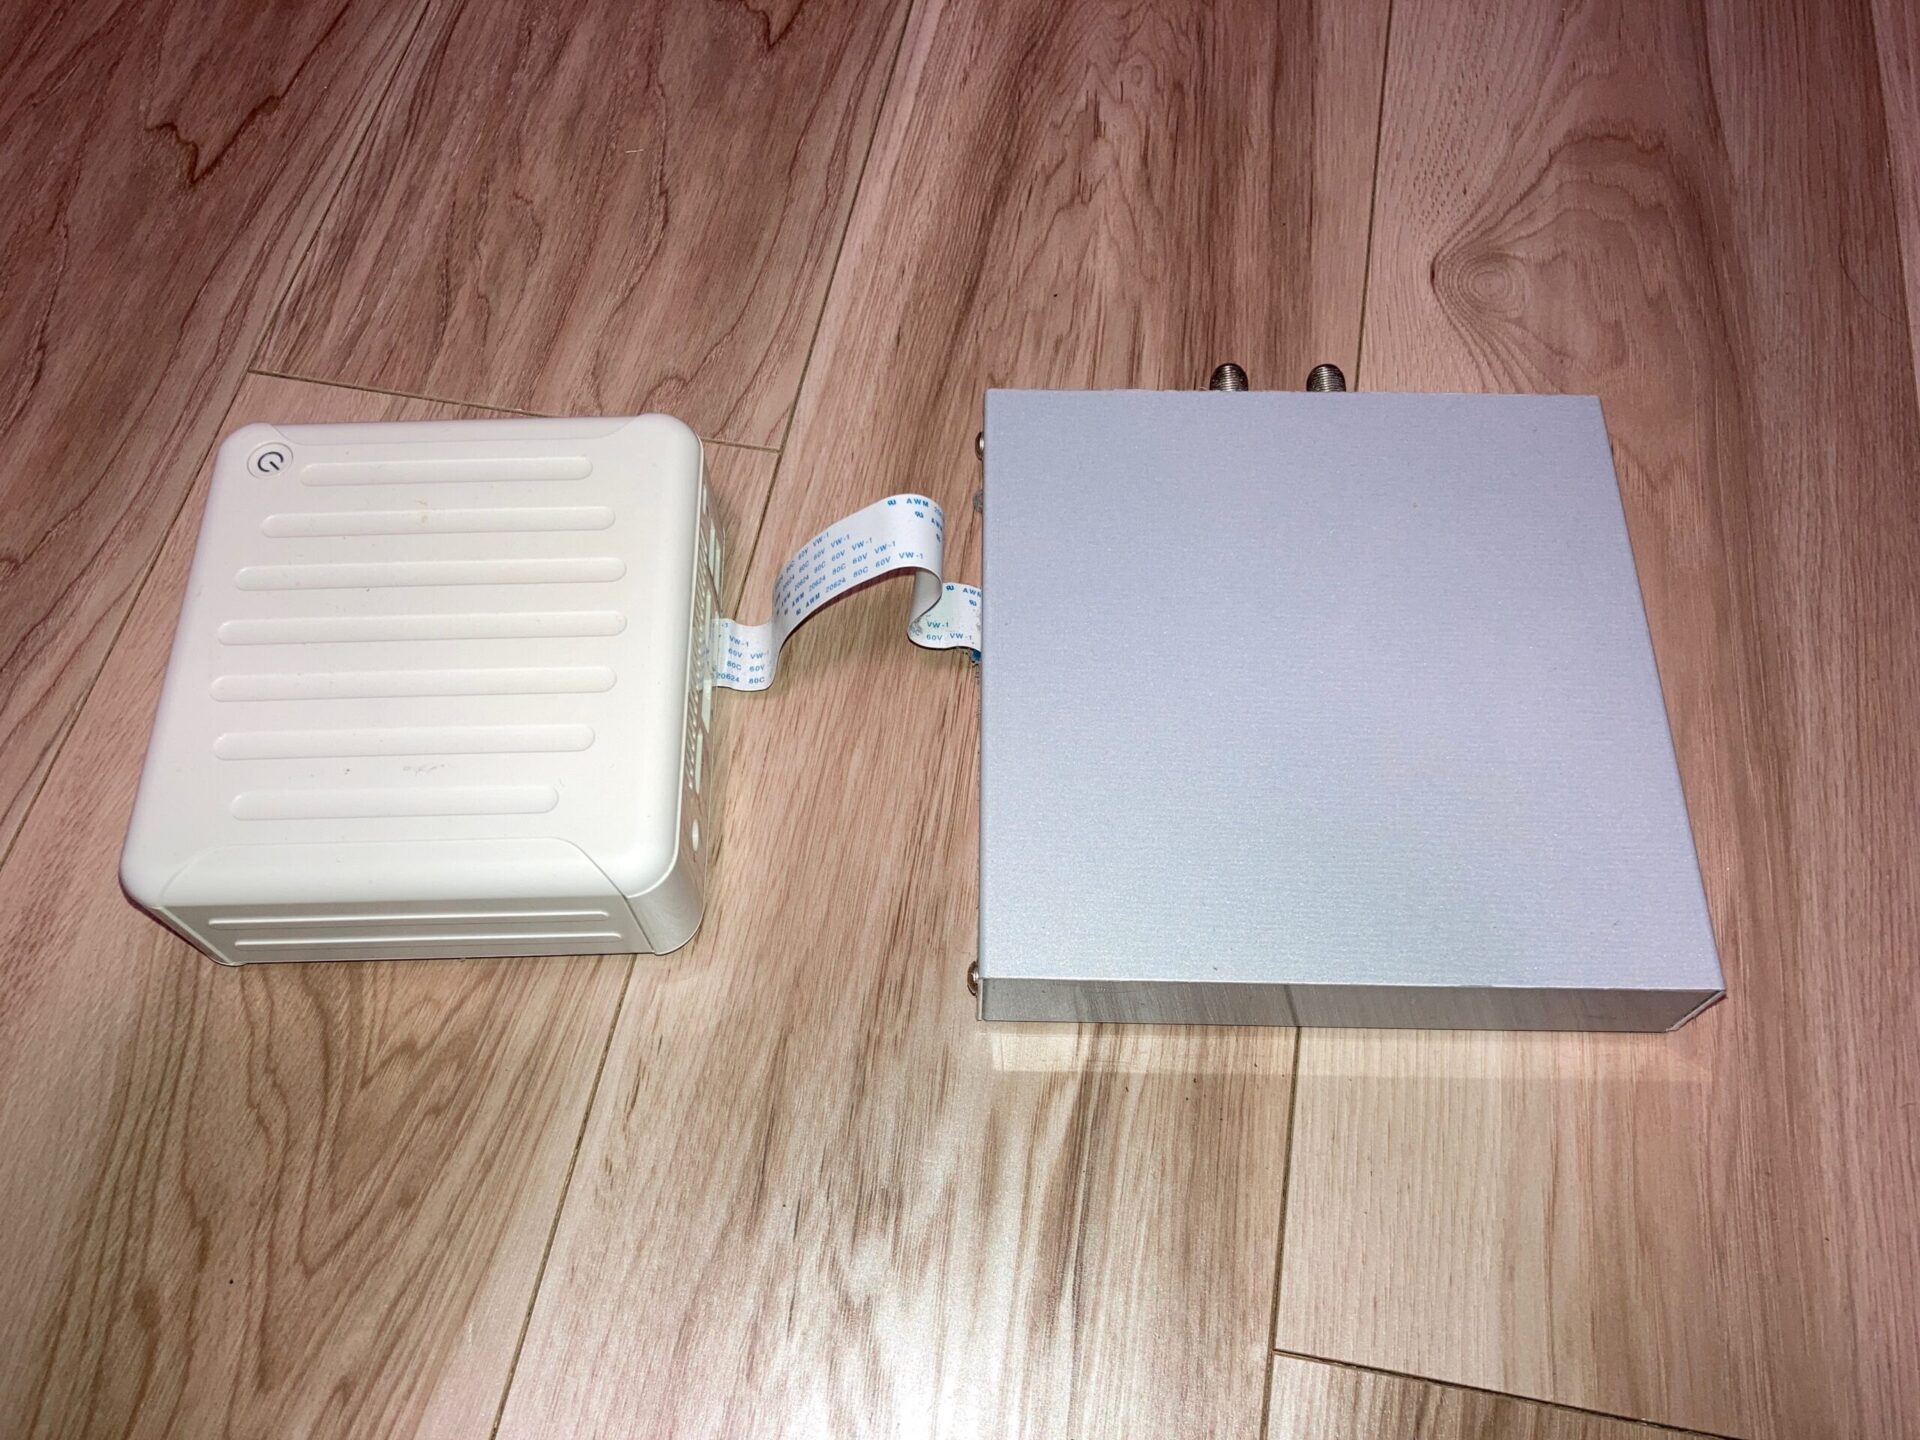
- Enclosed the PT3 in a TAKACHI MB series aluminum case instead of leaving it bare.
- Added a USB 3.0-connected 12TB HDD for storing recorded data.
While wireless LAN could no longer be used, it was not an issue since it operated on a wired LAN.
The PT3 also operated solely on the 3.3V supplied from miniPCIe
Recording and Encoding
Recorded data was saved to an external HDD in TS format. However, because the HDD capacity tended to run short, I started converting recordings to H.264 (MP4) using ffmpeg halfway through. That said, since the CPU was an Intel Celeron J3160, software encoding was extremely slow, and while I attempted hardware encoding, it did not work properly.
Issues
This recording server had several challenges.
- Shuts down during power outages
- For a period, I used an inexpensive UPS costing about 5,000 JPY, but the built-in lead-acid battery degraded after about 3 years, forcing me to abandon its use.
- Slow encoding speed
- The low-power CPU (Celeron J3160) lacked power, making encoding take a long time.
- Tried hardware encoding, but it failed to function correctly.
- End of CentOS 7 support
- Support ended in June 2024, presenting security risks.
Migration Plan
To resolve these issues, my next recording server is planned to utilize a laptop PC.
- Proposed Configuration
- Insert a riser card into the laptop’s M.2 slot (intended for Wi-Fi) and connect the PT3.
- Connect the 12TB HDD via USB (internal mounting would be ideal, but difficult).
- Using a laptop allows the battery to act as a UPS, reducing risks during power outages.
Aiming for a more efficient and stable recording environment, I will proceed with the upcoming migration work.