No Docker Required: Building a Lightweight Local LLM Environment with WSL2 and Podman
Currently, I am experimenting with building a “multi-agent" system that coordinates multiple AIs.
Rather than letting SaaS (such as ChatGPT or Gemini) handle all processing, I decided to go with a hybrid architecture combined with a local LLM running on my own machine.
To build the local LLM environment, I use containers that keep the Windows side clean. While standard Docker is an option, Docker leaves a daemon (management process) running in the background even when idle and not using AI, needlessly consuming PC resources. For future multi-agent development, I want to keep my local environment as streamlined and lightweight as possible.
Therefore, this time I built a clean local LLM environment (Ollama + Open WebUI) on WSL2 using “Podman," which has low resource consumption and runs completely daemonless.
Keeping Two Local LLMs in Standby
The specific goals are as follows:
- Environment cleanup: Avoid installing Docker Desktop on Windows, and reduce background processes completely to “zero" when containers are stopped.
- Multi-model standby: Taking advantage of the RTX 3060 (12GB VRAM) headroom, launch two lightweight models strong in Japanese (qwen3:4b and gemma3:4b) simultaneously.
[Personal Experience] The “5 Traps" I Fell Into When Migrating to Podman
When switching from Docker to Podman, I neatly fell into several traps. Knowing the following countermeasures should save you from wasting time.
- Trap where the GPU is not recognized
GPU does not work with Docker syntax. Instead, use “CDI," an official mechanism provided by NVIDIA to connect GPUs directly to containers. - Trap where images cannot be downloaded
Podman is strict about security and rejects shorthand names. Always specify the full path (fully qualified name) like docker.io/ollama/ollama. - Trap where chat history disappears
Directly specifying a Windows-side folder causes database corruption due to permission errors. Use “named volumes," where Podman automatically creates a safe storage area. - Trap where loading takes longer after 5 minutes of inactivity
By default, models are evicted from VRAM if there is no chat activity for 5 minutes. Set the environment variable OLLAMA_KEEP_ALIVE=-1 to disable timeout and keep them resident in VRAM at all times. - Trap where models are not loaded simultaneously
Even if you try to switch and use two models assuming a multi-agent setup, the default specification is that “only one model can be loaded into VRAM at a time." Explicitly specify the environment variable OLLAMA_MAX_LOADED_MODELS=2 to allow simultaneous standby of two models.
[Shortest Build Procedure] docker-compose.yml
As a prerequisite, it is assumed that a WSL2 (Ubuntu 22.04 or later) environment is prepared.
Step 1: Installing Podman and GPU Integration Tools
Open the Ubuntu terminal and install the required packages.
# Podman core and Compose tools introduction
sudo apt update
sudo apt install -y podman podman-compose podman-docker

# Introduce NVIDIA-provided GPU passthrough tool
sudo apt-get install -y nvidia-container-toolkit

# Automatically generate configuration file for CDI (direct GPU connection mechanism)
sudo nvidia-ctk cdi generate --output=/etc/cdi/nvidia.yaml
Step 2: Creating docker-compose.yml
Create the following docker-compose.yml in an appropriate working folder. This is the definitive edition incorporating all countermeasures against the “5 traps based on personal experience" mentioned above.
services:
  ollama:
    image: docker.io/ollama/ollama
    container_name: ollama
    ports:
      - "0.0.0.0:11434:11434"
    environment:
      - "OLLAMA_KEEP_ALIVE=-1"          # Countermeasure for Trap 4: Disable timeout
      - "OLLAMA_MAX_LOADED_MODELS=2"    # Countermeasure for Trap 5: Simultaneous standby of 2 models
    volumes:
      - ollama_data:/root/.ollama       # Countermeasure for Trap 3: Named volume
    devices:
      - nvidia.com/gpu=all              # Countermeasure for Trap 1: GPU passthrough via CDI

  open-webui:
    image: ghcr.io/open-webui/open-webui:main
    container_name: open-webui
    ports:
      - "0.0.0.0:3000:8080"
    environment:
      - OLLAMA_BASE_URL=http://ollama:11434
    volumes:
      - open-webui_data:/app/backend/data
    depends_on:
      - ollama

volumes:
  ollama_data:
  open-webui_data:
Step 3: Startup and Fetching AI Models
Do not use sudo under any circumstances; run the startup command as a regular user.
podman-compose up -d
Once started, download the models you want to use within the Ollama container.
podman exec -it ollama ollama run qwen3:4b
podman exec -it ollama ollama run gemma3:4b
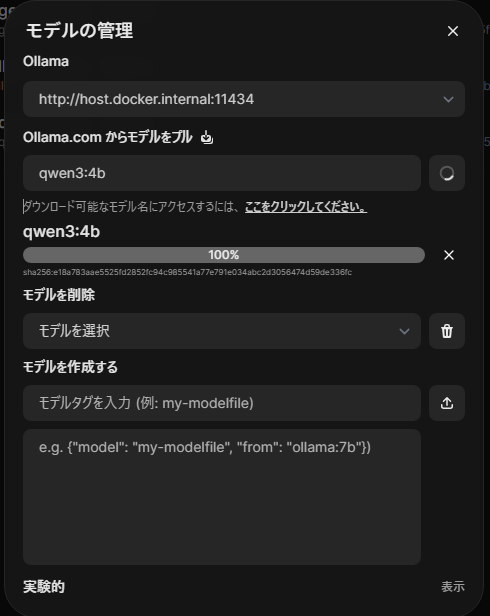
You can also add models via settings on the browser.
Step 4: Disabling Timeout on the WebUI Side
Access http://localhost:3000 from your Windows browser and log in to Open WebUI. Navigate to “Admin Panel" > “Settings" > “General" > “Advanced Parameters" at the bottom left of the screen, change the “Keep Alive (Ollama)" item to -1, and save.
[Summary] A Clean Foundation to Leverage Local Resources is Complete
When no longer needed, simply shut it down with podman-compose down, and background processes and VRAM consumption will drop completely to “zero."
By moving away from standard Docker Desktop and implementing Podman with a little ingenuity, I obtained an extremely clean environment that makes efficient use of limited resources (RTX 3060) without waste.
Using this agile local LLM environment as a foundation, next time I will proceed with building a “multi-agent" system that actually integrates with SaaS (such as Gemini).