Completing the System for Instant Gmail Notifications via iPhone Messages [Configuration Guide]
In the previous [Problem Occurrence Edition], we faced the issue where using Gmail with the iPhone’s Mail app did not support push notifications, failing to trigger automations in real time.
As a workaround, I switched to a configuration where emails are automatically forwarded from Gmail to an Outlook email account (which supports push notifications), and an iPhone Shortcut automation is triggered upon receiving that email to send an iMessage notification.
In this post, I will specifically explain how to set up this configuration in a way that is completely free, requires no Mac, and is completed entirely on the iPhone.
Overall Flow (Review)
The overall system configuration is as follows:
Receive specific email in Gmail
↓ (Conditional filter + Forwarding)
Instantly forwarded to Outlook mail (Push supported)
↓
Instantly received in the iPhone "Mail" app
↓
Automation is triggered
↓
Notification sent to self via iMessage
Gmail to Outlook Forwarding Setup
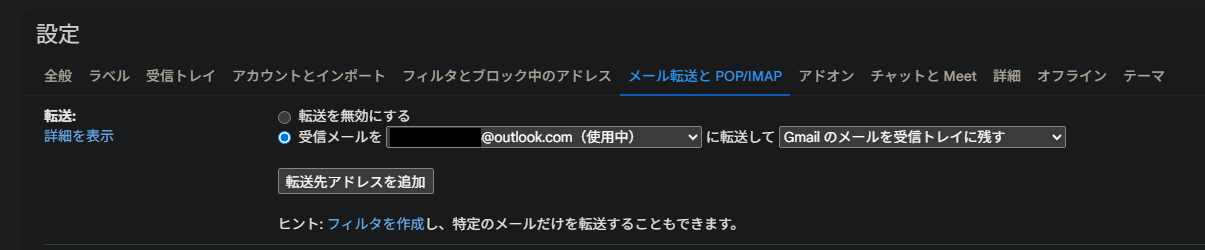
Enable Forwarding in Gmail
- Log in to Gmail and open "⚙ Settings > See all settings"
- Select the "Forwarding and POP/IMAP" tab
- Click "Add a forwarding address" and enter your Outlook address
- A confirmation email will be sent to Outlook; click the link inside to authenticate
Create a Filter for Forwarding Conditions
- Go to Gmail’s "Settings > Filters and Blocked Addresses" (located to the left of POP/IMAP)
- Click the "Create a new filter" button
- Specify conditions (e.g.,
From = notify@timescar.jp, subject contains "Cancel") - Click "Create filter with this search" -> Check "Forward it to:"
- Select the Outlook address you authenticated earlier as the forwarding destination and save
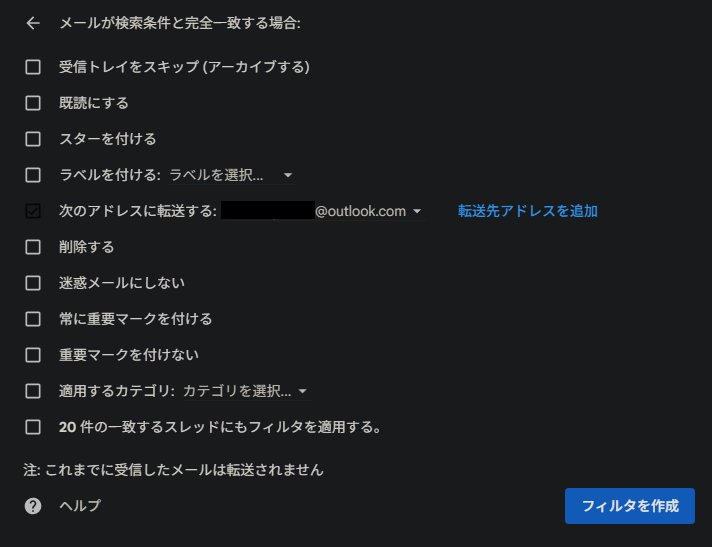
✅ Tip: Instead of forwarding all emails, narrowing them down to specific conditions improves notification accuracy.
Registering Outlook Mail on iPhone
- Go to iPhone "Settings > Mail > Accounts > Add Account"
- Select "Outlook.com" or "Exchange"
- Sign in with your Microsoft account
- Turn on "Mail" only and complete the registration
With this setup, Outlook emails can be received in real time on the iOS Mail app.
Creating an Automation in the Shortcuts App
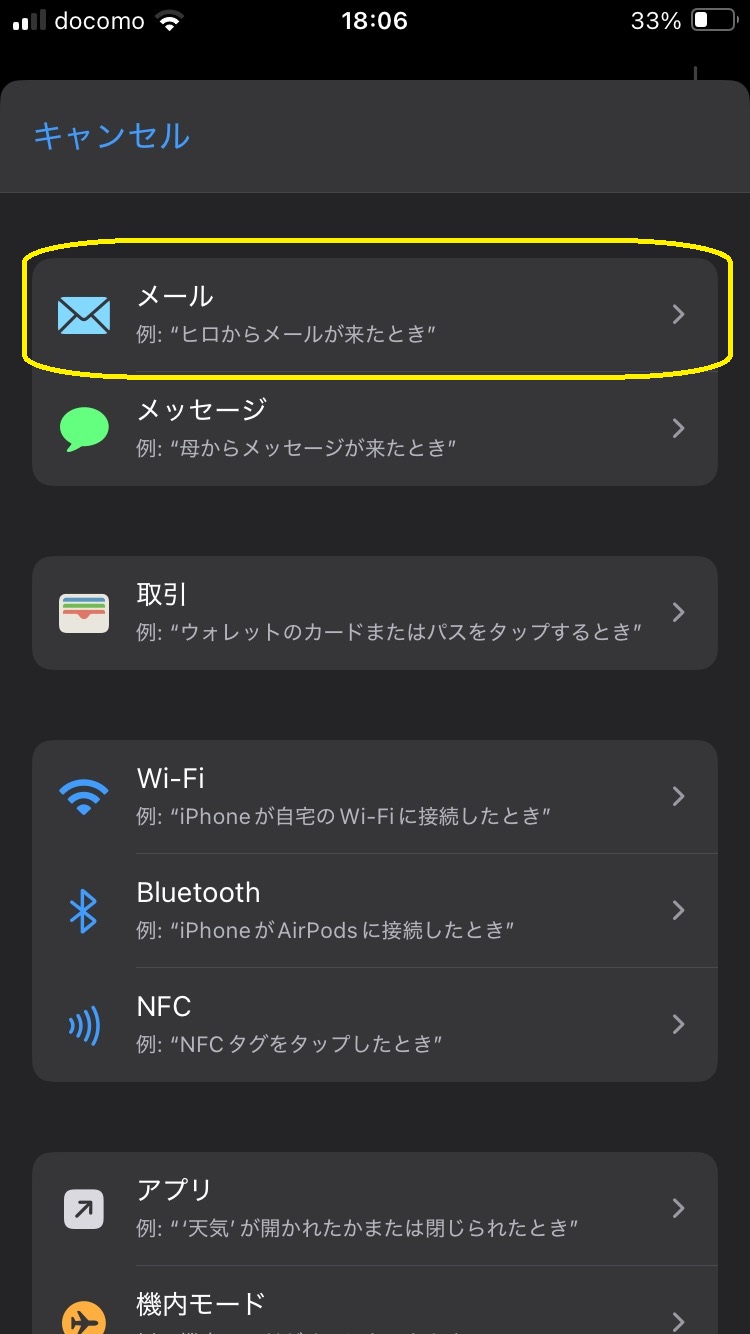
Create a New Automation
- Open the "Shortcuts" app and go to the "Automation" tab
- Tap "+" -> "Create Personal Automation"
- Select "Email"
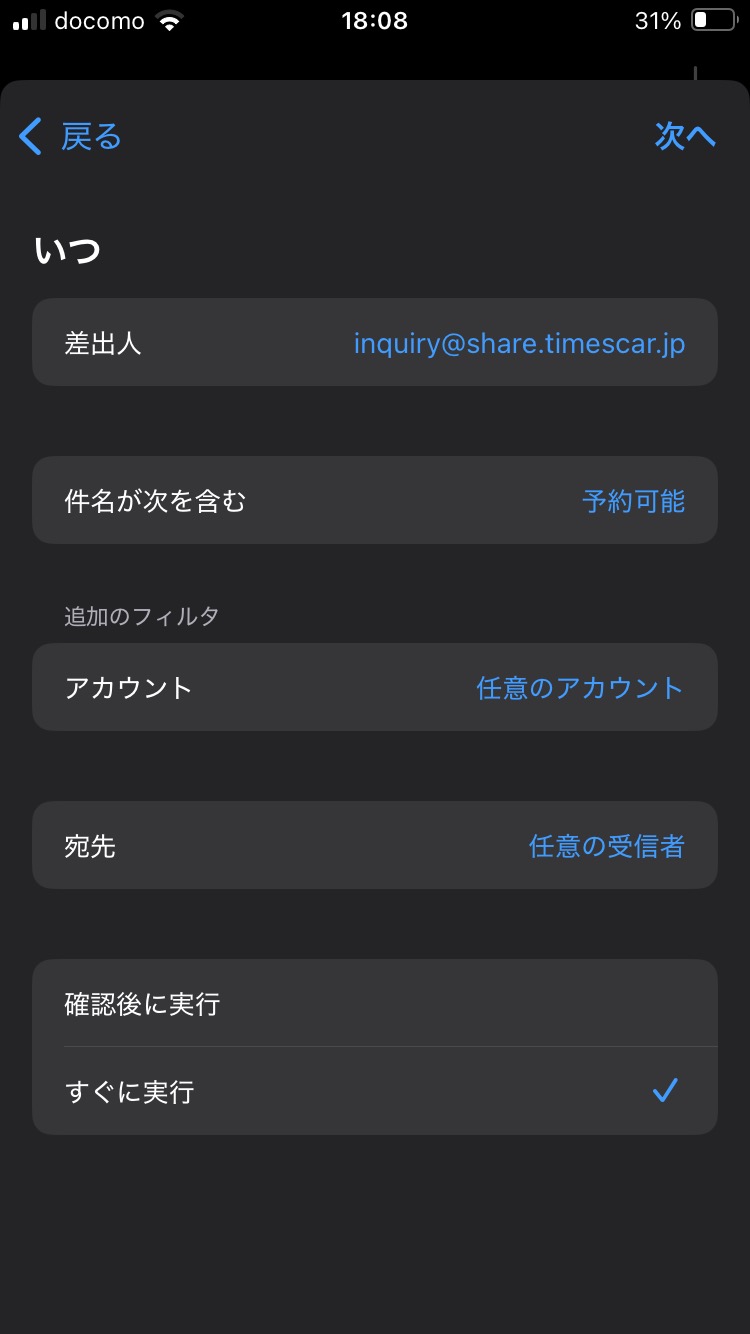
Configure Trigger Conditions
- Select "Account" -> Outlook
- Narrow down target emails by "Sender" or "Subject"
- Tap "Next" in the upper right
Add "Send Message" to Actions
- Tap "Add Action" -> "Send Message"
- Enter your own phone number or Apple ID as the recipient
- Create the body of the notification message (e.g., "🚗 A cancellation became available on Times Car")
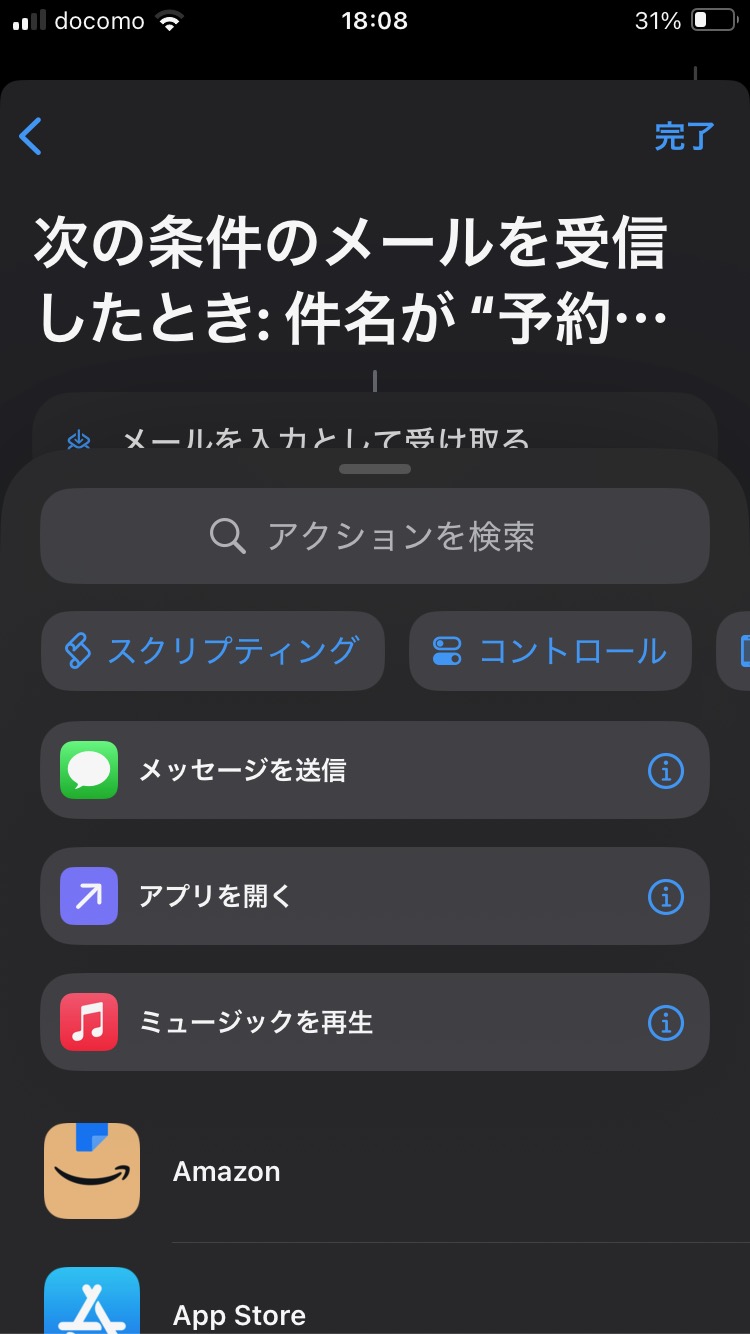
✅ When sending via iMessage, notifications will be delivered instantly to the Messages app.
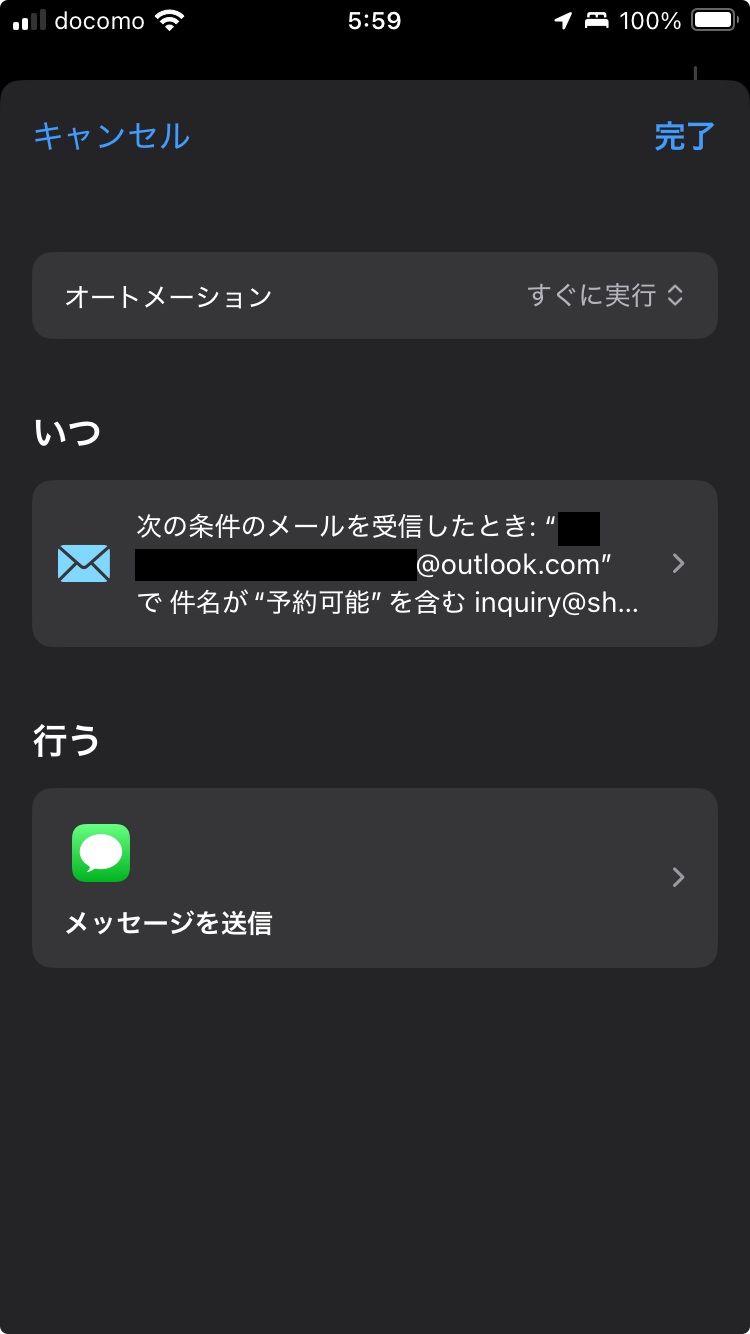
Turn Off "Ask Before Running"
- On the execution confirmation screen, toggle off "Ask Before Running"
- Select "Don’t Ask" to finish
Operation Testing
- Send a test email matching the conditions to Gmail
- Verify that it is instantly forwarded to Outlook
- Check if the message notification arrives on the iPhone
- Confirm that the automation history shows "Run"
Tips for More Practical Usage
- Set multiple recipients to notify family members as well
- Retrieve the email body and branch based on the content (detailed version automation)
- Control consecutive runs or duplicate notifications (interval limits or content identification)
Conclusion
The method built here is a highly practical notification system that satisfies all of the following requirements:
| Requirement | Status |
|---|---|
| Instant Notification (Push) | ✅ Achieved via Outlook |
| Completed entirely on iPhone | ✅ No Mac or external services required |
| Notifications delivered to iMessage | ✅ Received via the Messages app |
| Free | ✅ Uses only native Apple features |
It all started with the goal to "receive instant notifications from Gmail," but by taking into account the differences in email notification methods, I was able to land on a solution that yields maximum results with minimal configuration changes.
Epilogue
Notification automation is a deceptively deep world. While you may hit "specification walls" like the one encountered this time, reviewing the configuration from a different perspective can sometimes lead you to an unexpectedly smart solution.
Next time, I plan to dive deeper into application examples for this configuration, customization of notification content, and setting automatic stop conditions.