Building a PiKVM with Raspberry Pi 3, Pico, and a Budget USB Capture Board – Part 4: VPN Monitoring Edition
So far, through the hardware, software, and case design installments, we have successfully built our own DIY PiKVM using a Raspberry Pi 3, a Pico-compatible board, and an HDMI-USB capture board. In this article, we will explain the configuration for PiKVM’s monitoring functions and remote management using Tailscale VPN. This setup allows you to build a reliable environment where, even if an unexpected server issue occurs, you can perform reboots and troubleshooting remotely with peace of mind.
Current Status and Issues with the Browser Terminal
Web Terminal Login Status
When you access the terminal via the PiKVM web UI, you are logged in by default as the “kvmd-webterm" user.
However, for some reason, the password for the “kvmd-webterm" user is not set by default, preventing you from switching from this user to the root user (using the su command) or changing the password, which creates operational inconveniences.
Checking sudoers Configuration
Even when checking the following file (/etc/sudoers.d/99_kvmd):
kvmd-pst ALL=(ALL) NOPASSWD: /usr/bin/kvmd-helper-pst-remount
It only contains the above entry, meaning no sudo privileges are granted to the kvmd-webterm user.
Solution: Setting a Password for the kvmd-webterm User
Configuration Changes via Root Login over SSH
Therefore, first log in to the PiKVM via SSH as the root user (initial password: root).
Follow the steps below to set a password for the kvmd-webterm user.
-
Switch the filesystem to Read-Write mode
[root@pikvm ~]# rw
+ mount -o remount,rw /
+ mount -o remount,rw /boot
+ set +x
=== PiKVM is in Read-Write mode ===
-
Set a new password for the kvmd-webterm user
[root@pikvm ~]# passwd kvmd-webterm
New password:
Retype new password:
passwd: password updated successfully
-
Switch the filesystem back to Read-Only mode
[root@pikvm ~]# ro
+ mount -o remount,ro /
+ mount -o remount,ro /boot
+ set +x
=== PiKVM is in Read-Only mode ===
With this configuration, you can now switch to root privileges from the browser terminal by running the su command and entering the root user’s password (initial value: root).
Configuring Remote Management via Tailscale VPN
Installing and Configuring Tailscale
To manage PiKVM remotely, we will introduce Tailscale VPN. Please refer to the official installation instructions here. Below are the basic installation steps:
-
Update PiKVM
Run the latest pikvm-update to update the system. -
Install the Tailscale Client
[root@pikvm kvmd-webterm]# rw
+ mount -o remount,rw /
+ mount -o remount,rw /boot
+ set +x
=== PiKVM is in Read-Write mode ===
[root@pikvm kvmd-webterm]# pacman -S tailscale-pikvm
resolving dependencies...
looking for conflicting packages...

Packages (2) tailscale-1.82.0-1 tailscale-pikvm-0.9-1

Total Download Size: 9.97 MiB
Total Installed Size: 36.80 MiB

:: Proceed with installation? [Y/n] Y
:: Retrieving packages...
tailscale-1.82.0... 10.0 MiB 2.55 MiB/s 00:04 [########################] 100%
tailscale-pikvm-... 3.4 KiB 2.74 KiB/s 00:01 [########################] 100%
Total (2/2) 10.0 MiB 1820 KiB/s 00:06 [########################] 100%
(2/2) checking keys in keyring [########################] 100%
(2/2) checking package integrity [########################] 100%
(2/2) loading package files [########################] 100%
(2/2) checking for file conflicts [########################] 100%
(2/2) checking available disk space [########################] 100%
:: Processing package changes...
(1/2) installing tailscale [########################] 100%
(2/2) installing tailscale-pikvm [########################] 100%
:: Running post-transaction hooks...
(1/2) Reloading system manager configuration...
(2/2) Arming ConditionNeedsUpdate...
-
Enable the Tailscale Service
[root@pikvm kvmd-webterm]# systemctl enable --now tailscaled
Created symlink '/etc/systemd/system/multi-user.target.wants/tailscaled.service' -> '/usr/lib/systemd/system/tailscaled.service'.
-
Start the Tailscale Connection
[root@pikvm kvmd-webterm]# tailscale up

To authenticate, visit:

https://login.tailscale.com/a/a456xxx

Success.
Starting Tailscale will display a URL for authentication. Access that URL and log in to complete the connection.
-
Configure Tailscale (Optional)
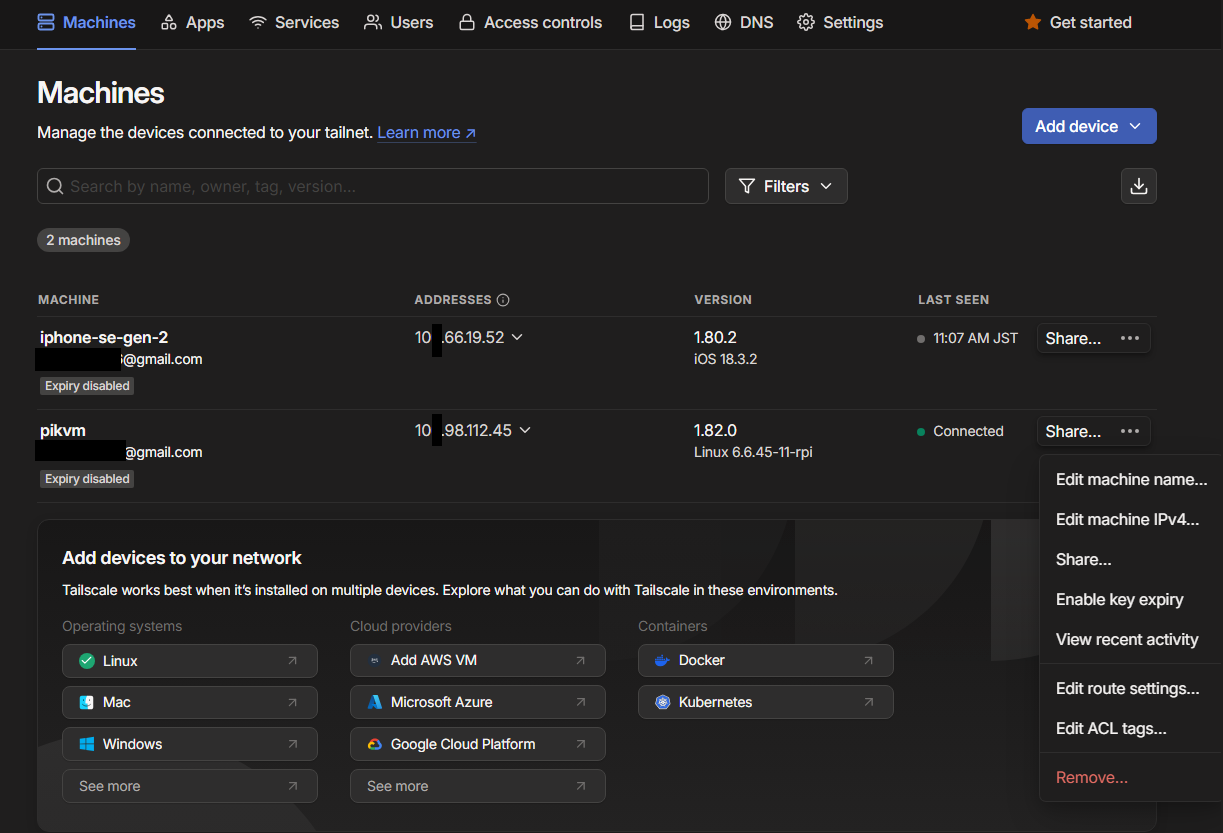
If necessary, consider configuring the expiration to never expire by using the “Disable key expiry" option. Select Machines > click the … next to pikvm > Disable key expiry

Remote Connection via Smartphone
-
Install the Tailscale app on your smartphone (available for both iOS and Android).
-
Turn on the VPN connection within the app and connect to the Tailscale network that the PiKVM belongs to.

-
You can access the PiKVM from your smartphone’s browser by entering the IP address assigned to the PiKVM by Tailscale.
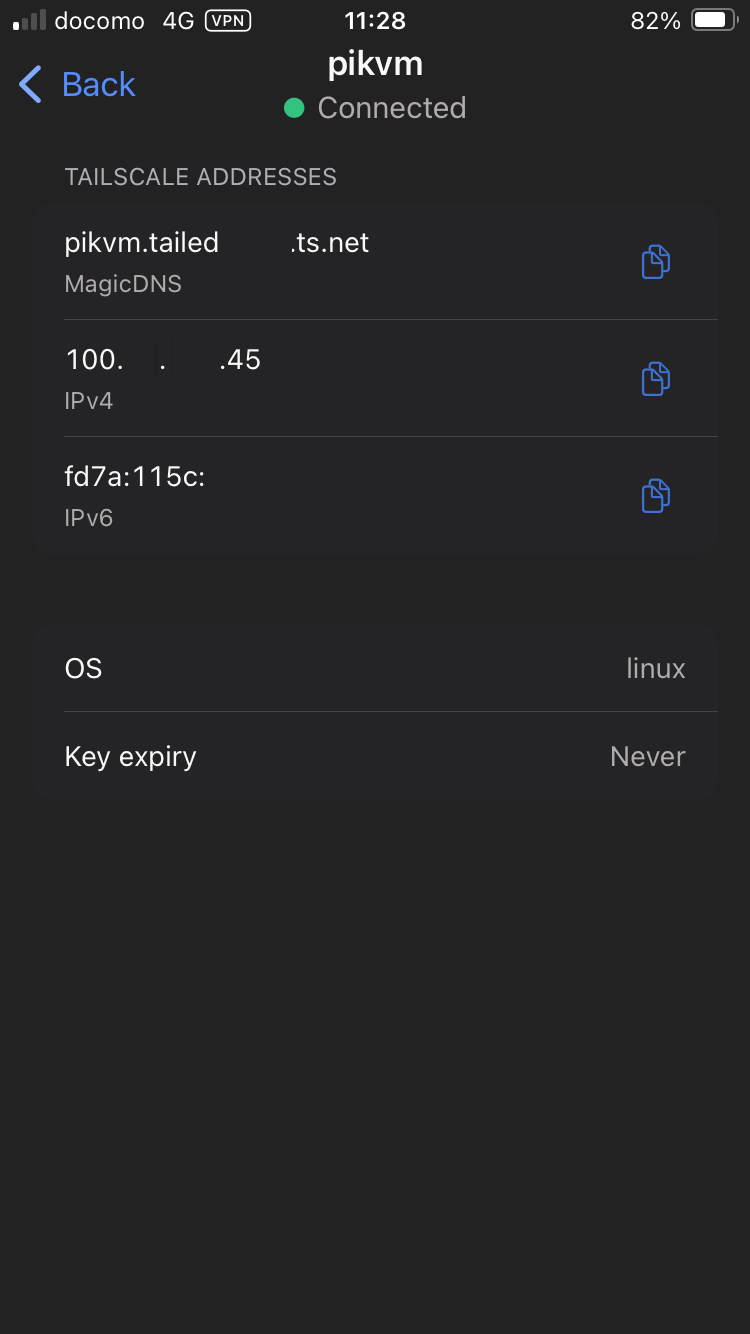
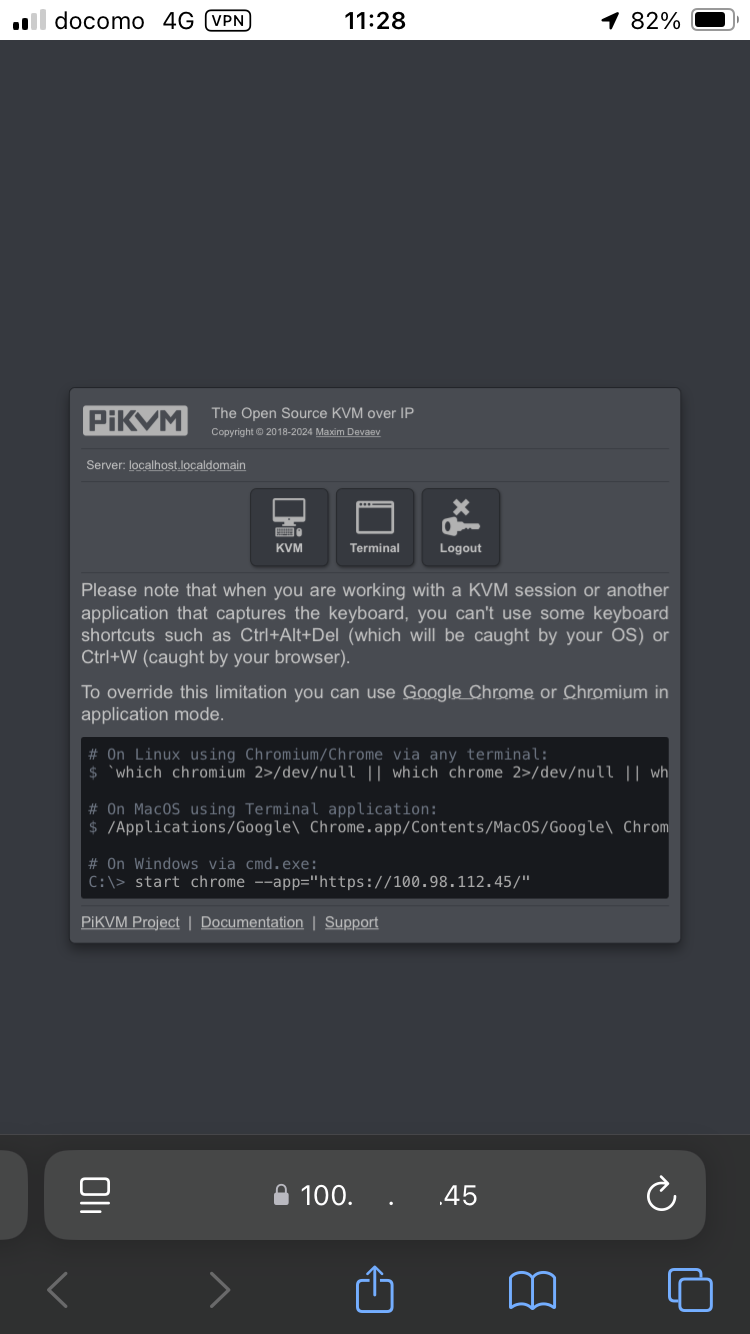
This ensures that even if a server issue occurs, you can remotely restart the PiKVM or check logs, achieving a stable remote management environment.
Conclusion
In this article, we explained the measures to set up PiKVM’s monitoring functions and remote management environment.
-
Resolved the issue where the password for the “kvmd-webterm" user, which is used for default login to the browser terminal, was not set, by modifying settings via SSH.
-
Enabled remote access and management from smartphones through the introduction of Tailscale VPN, establishing a framework to handle unexpected troubles with peace of mind.
With these configurations, the system has become a secure and responsive setup that can be handled remotely and promptly at all times, even for monitoring purposes with the ASRock Beebox. We will continue to implement further updates aimed at achieving a comfortable operational experience.