Building a PiKVM with Raspberry Pi 3, Pico, and a Cheap USB Capture Board – Case Edition
In the previous hardware and software editions, we built a PiKVM using a Raspberry Pi 3, a Pico clone, and an HDMI-USB capture board. This time, we will take on the challenge of creating a custom case to house this system. In particular, we’ll introduce the final form where a model was designed using FreeCAD, printed with a 3D printer, and integrated with the Raspberry Pi 3 and Pico.
Model Design with FreeCAD
The case was designed using FreeCAD, focusing on the following points:
-
Raspberry Pi 3 Mounting
The mounting position and dimensions for the Raspberry Pi 3 were accurately identified by referencing the Mounting Hole image from Raspberry Pi Spy. This ensures the Pi 3 can be securely fixed inside the case. -
Pico Clone Mounting
Since exact data for the Pico clone was unavailable, we took physical measurements to verify its size and designed the mount with a comfortable tolerance for a snug fit.
Printing the Case with a 3D Printer
The data designed in FreeCAD was exported to the STL format, and the case was printed using a 3D printer. Designed to accommodate both the Raspberry Pi 3 and the Pico, this case features a simple structure with internal mounting holes and spaces to secure each component.
Assembly and Final Form
We installed the previously built Raspberry Pi 3 and Pico into the printed case. Because this project is intended for monitoring an ASRock Beebox and does not require a PS/2 keyboard or mouse connection, the implementation is delightfully simple.
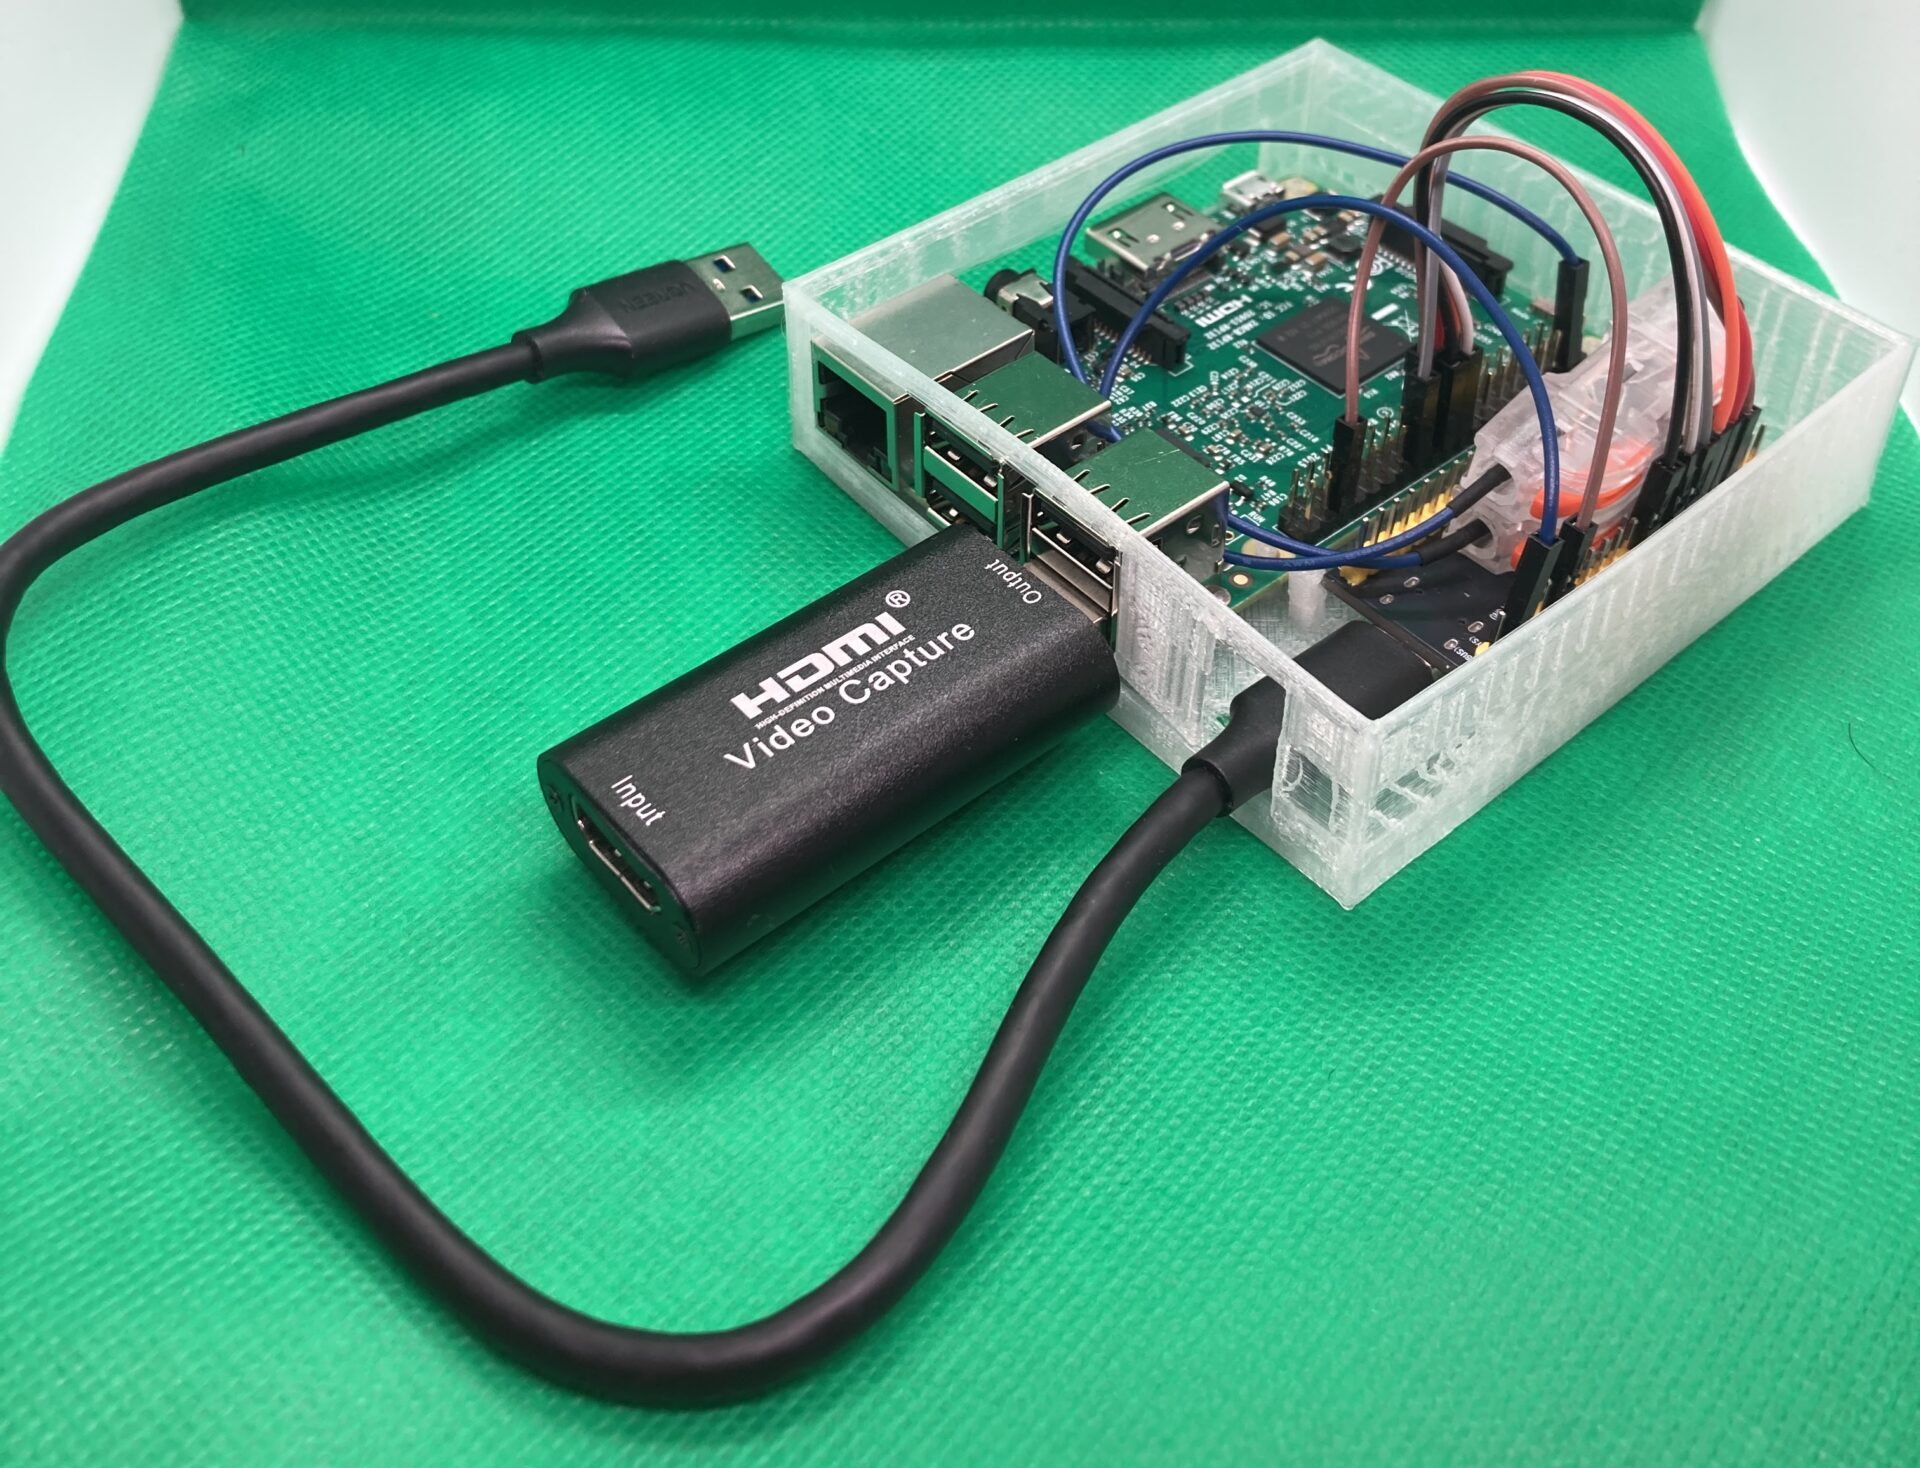
Additionally, we intentionally designed the case without a lid, exposing the internal electronic circuits and boards to give it an authentic “maker" aesthetic. This design emphasizes a DIY vibe and technical appeal.
Conclusion
The case designed in FreeCAD and printed with a 3D printer was built and processed based on the precise mounting positions of the Raspberry Pi 3 (reference site) and the actual dimensions of the Pico clone. The finished case is simple yet securely holds the internal components in place, and leaving the lid off creates a wonderful DIY look. Next time, we will put this completed system into action and introduce the verification of its monitoring functions.