[Epic Fail] I Tried Replacing the Battery on my iPhone SE2 (2020)
This time, I took on the challenge of replacing the battery on my iPhone SE2 (2020), which I’ve been using for about 5 years.
Since I’d successfully replaced device batteries several times before, I thought this time would go smoothly too… but the result was a massive failure.
I’d like to share the details and the lessons learned from this experience.
Why I Decided to Replace It
The iPhone SE2 is a favorite device I’ve cherished since its release. However, after 5 years of use, the battery has steadily degraded.
- The maximum battery capacity display dropped to “76% (1821mAh when new → approx. 1400mAh now)," and it started causing issues for daily use.

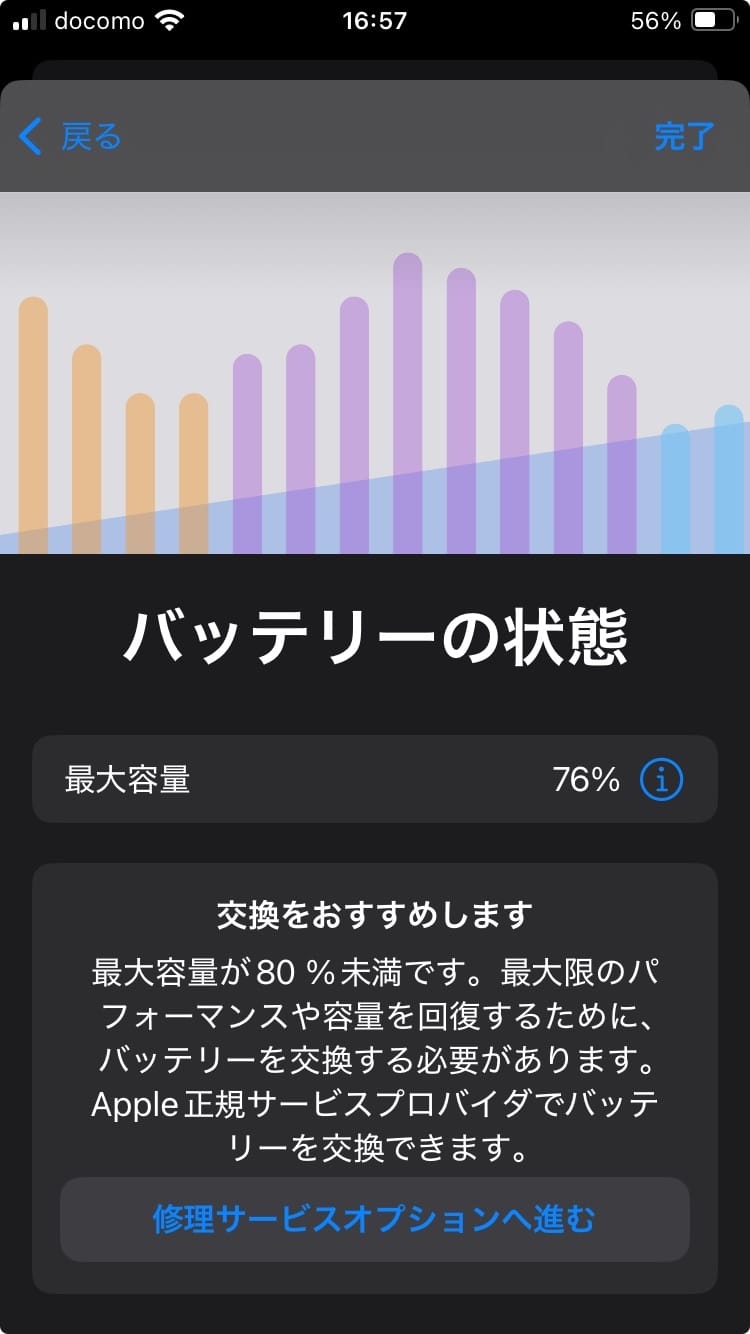
Determined to “extend its life by replacing it myself!" I prepared a replacement battery. I chose a third-party 2340mAh nominal battery. Being drawn to that nominal capacity spec was probably my first mistake…
Past Track Record
Actually, I’ve had experience replacing batteries on several devices before:
- MacBook Air 11-inch
- iPhone 5
- iPhone SE (2016)
Since I had completed all of these replacements without any particular issues, I grew overconfident that I could handle this one the exact same way.
Trouble During the Process
The work itself proceeded through the usual steps:
- Open the front panel using specialized tools
- Disconnect the battery connector and remove the degraded battery
- Install the new battery and reassemble everything
However, the problem occurred right at the front panel opening stage.
- Accidentally severed the cable
- I pulled too hard on the cable connecting the front camera, front sensors, and earpiece speaker, causing it to snap completely.
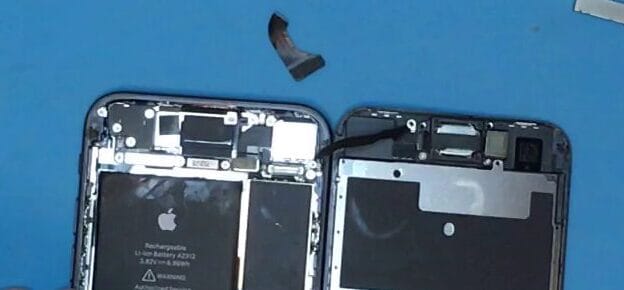
As a result, the front camera, facial recognition, and call speaker stopped working.
What Succeeded
On the other hand, the battery replacement itself was a success.
- The capacity of the new third-party battery recovered to about 2200mAh.
- The maximum capacity display returned to “100%," drastically improving battery life.
However, whether this success softens the shock of the mishap is… questionable.
Lessons Learned
The lessons gained from this failure are as follows:
- Thoroughly check the internal structure beforehand
- The SE2 front panel is connected by extremely delicate cables. I should have handled it with much more care to reduce the risk of breakage.
- Follow the iFixit instructions meticulously
- When doing DIY repairs, make sure to thoroughly consult the iFixit guide. It provides detailed step-by-step instructions with photos, making it clear where you need to be careful. Just “glancing at it" this time around was definitely part of why I failed…
- Choose genuine or highly reliable replacement kits
- The nominal rating of a third-party battery is merely a reference. I probably should have chosen a genuine part or a more reliable compatible alternative.
- Set up a proper workspace
- I should have ensured adequate lighting and workspace, and carried it out in a state of full concentration.
Summary
Looking back at this project, the successful and failed parts were very clear.
- Success: The battery replacement itself went without issues, recovering capacity to about 2200mAh. This drastically improved battery longevity.
- Failure: I severed the cable leading to the front camera and sensors, rendering the front camera, speaker, and sensors completely unusable.
Consequently, I now also need to replace the cable connected to the front camera and sensors, resulting in unexpected repair costs.
What was meant to temporarily cut costs by attempting a DIY repair ultimately ended up increasing my extra expenses.
Next time, I plan to take on the challenge of replacing the cable connected to the front camera and sensors.
I’d be glad if this tale of failure serves as even a slight reference for anyone considering a DIY repair!