Blinking a 100-Yen LED Decoration Light with an Oscillation Circuit
I am a beginner camper with only two camping trips under my belt, but one thing became painfully clear to me very early on:
The ropes and pegs securing tents and tarps are truly invisible once the sun goes down.
While you can spot them by shining a headlamp, I ran into situations a few times where:
- I almost tripped over a guy line while walking around the campsite
- I felt a jolt of anxiety watching kids run around, nearly stumbling over pegs and ropes
There are commercially available reflector ropes or dedicated LED lights for guy lines, but my situation was simply: “I just need to know where the ropes around my site are for one single night, and that’s enough."
With that in mind, I decided to build a DIY LED rope marker with a very pragmatic philosophy:
As long as it can run on batteries for just one night and glow enough to reveal the positions of ropes and pegs, that’s good enough.
Modification Material: A 10-LED String Lamp Powered by 3V
At home, I had a “10-LED string lamp" that I bought at a 100-yen shop, which lights up simply by applying 3V.
It’s the kind of Christmas-style LED string with 10 bulbs hanging off it.
- Powered by two AA batteries (approx. 3V)
- Lights up uniformly when directly connected to a battery box
- A very simple structure with no special control circuit built-in
My strategy was to use this “10-LED string lamp" as-is for the rope marker’s light source, while adding blinking functionality on the electronics side.
Goals
Since the purpose here is “footwear hazard awareness," I wasn’t too particular about brightness or color. Instead, battery life was a priority. I roughly aimed for the following specs:
- Power supply: Two AA batteries (approx. 3V)
- Operating time: Should last through one night (about 8 hours)
- Average current for the 10-LED lamp: Aiming for the low milliamp range
(Assuming a peak current of 10 to 20mA, but dropping the average by narrowing the duty cycle) - Blinking cycle: Slowly fading on and fading off every 2 to 4 seconds
- A circuit compact enough to be bundled and housed in a small case near the rope
Rather than “illuminating brightly," the idea was that as eyes adjust to the dark, being able to discern the rope’s position would be totally fine.
Why a Single-LED Relaxation Oscillation Circuit Didn’t Work
First, I tried the classic relaxation oscillation circuit used to make a single LED blink.
I referred to the following resource:
Using 2SC1815 and 2SA1015 transistors combined with capacitors and resistors, it’s a textbook relaxation oscillation circuit that makes a single LED blink cleanly.
However, the moment I replaced the single LED in this circuit with the entire 10-LED string lamp, the behavior went haywire.
- Single LED: Blinks cleanly
- 10-LED string lamp:
- When connected in parallel with a single LED: It blinks faintly, but is extremely dim
- When replacing the single LED entirely: It barely lights up / oscillation stops
Analyzing the cause, the LED in this relaxation oscillation circuit serves a dual purpose:
- It acts as a “visual display" while simultaneously
- Acting as a diode that determines the discharge path for the capacitor.
It is a well-behaved LED embedded as an integral part of the circuit.
On the other hand, the contents of the 10-LED string lamp are:
- Built on the premise of multiple LEDs + resistors drawing a fair amount of current when directly connected to 3V
- Its forward voltage and I–V characteristics differ significantly from a “single LED + protective resistor" setup
Consequently, simply swapping it in broke the oscillation conditions.
Switching to a Design Separating the Oscillation Circuit and LED Drive
So, I changed my approach:
- Use the relaxation oscillation circuit as-is just as a “waveform generation stage"
- Treat the 10-LED string lamp as a load driven by a separate switching transistor
I adopted a two-stage configuration.
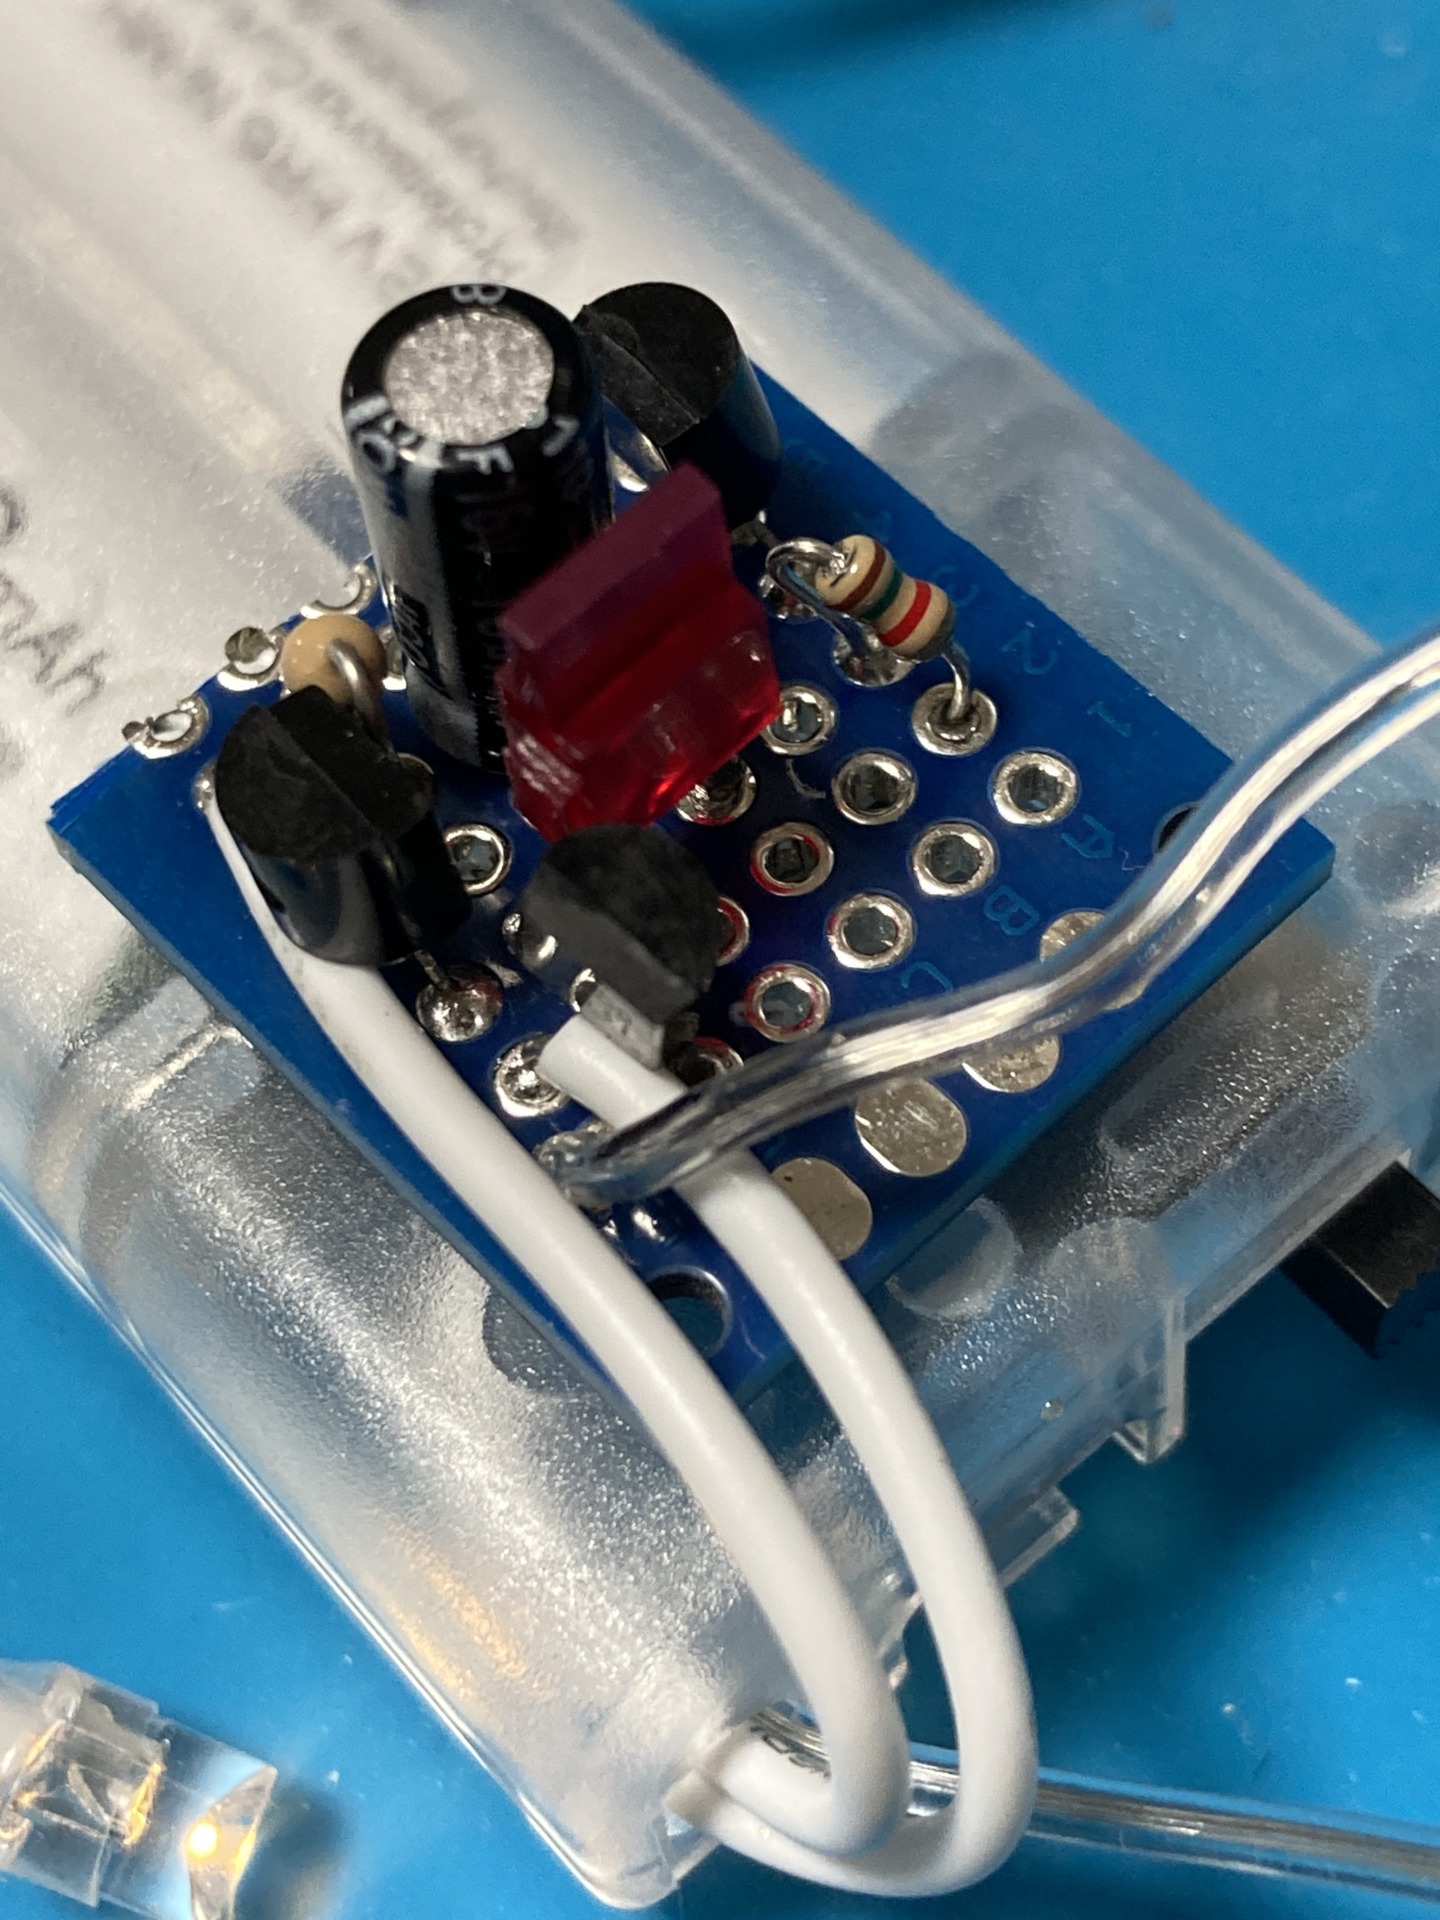
Stage 1: Relaxation Oscillation via 2SC1815 + 2SA1015
For the first stage, I used the reference circuit almost as-is.
- NPN: 2SC1815
- PNP: 2SA1015
- Relaxation oscillation with a multi-second cycle using capacitors and resistors
- Left a single LED in place to serve as a “visualizer" for the blinking waveform
I tried not to tamper with this part much, prioritizing keeping the oscillation conditions intact.
In this modification, I used the voltage variation appearing near the base-emitter junction of the 2SA1015 as the “blink signal." Since the electric potential changes in sync with the timing of the LED lighting up, that change is passed to the base of the second-stage transistor.

Stage 2: Low-Side Switching of the 10-LED String Lamp Using an S8050
On the 10-LED string lamp side, I set up a very simple low-side switch configuration using an S8050 transistor.
- Positive (+) side of the 10-LED lamp → 3V from two AA batteries
- Negative (-) side of the 10-LED lamp → Collector of the S8050
- Emitter of the S8050 → GND
And by connecting:
- From the node near the BE of the 2SA1015 side
- Through a base resistor of about 4.7 kΩ to several kΩ
- To the base of the S8050
I made it so that the S8050 turns ON precisely when the relaxation oscillation circuit judges it is time for “LED ON."

The key points here are:
- From the perspective of the relaxation oscillation circuit, keep the S8050 + 10-LED string strictly as a “light load hanging off the base."
- Strike a balance by securing enough base current to thoroughly saturate the S8050 while determining the resistance value within a range that doesn’t disrupt the first stage’s oscillation conditions.
When I measured the S8050 I had on hand, its hFE was in the 300s under the condition of Ic ≒ 2mA. So, if I wanted the lamp to glow around 20mA, estimating a saturation β of about 10 to 20 made a base resistor of several kΩ a sweet spot.
Actual Blinking Performance and Battery Life
Ever since adopting the two-stage configuration, the 10-LED string lamp has performed exactly as intended:
- Blinking just enough to reveal the positions of ropes and pegs in the dark
- A slow, gentle cycle of about 2 to 4 seconds for “fade-on → fade-off"
- More than sufficient visibility for a pitch-black campsite
I haven’t precisely measured the current consumption, but intuitively:
- Peak current: Around 10 to 20mA (during the lit phase only)
- Thanks to the narrowed duty cycle, the average stays down in the low milliamp range
It comfortably fits within expectations, lasting through a night of camping (around 8 hours) without issues using two standard alkaline AA batteries.
Conclusion: The Joy of Customizing Commercial LEDs to Fit Your Needs
This project started from a very specific motivation:
- “As a beginner with only two camping trips under my belt, I wanted to modify an LED lamp to make rope and peg locations easy to spot."
At first, I naïvely thought, “If there’s a 10-LED string lamp that runs on 3V, I can just swap it directly in place of the LED in the relaxation oscillation circuit." But in reality,
- The LED inside the circuit is a “component that shapes the waveform"
- The 10-LED string lamp is “just a load"
They have fundamentally different roles. To bridge that gap, I had to return to the basics of circuit design by separating the oscillation stage and the drive stage.
As a result, arriving at a configuration that made logical sense to me—
- Stage 1: Generating the blink signal via 2SC1815 + 2SA1015 relaxation oscillation
- Stage 2: Switching the 10-LED string lamp using an S8050
—was a rewarding payoff.