Integrating Bing Webmaster Tools and Clarity in WordPress (Cocoon)
Overview
Microsoft Clarity is a free tool designed to visualize user behavior on your website, allowing you to analyze visitor activity using heatmaps and session recordings. In this article, we will explain how to add Microsoft Clarity using Bing Webmaster Tools and integrate it with the WordPress Cocoon theme. Furthermore, we will also cover the installation procedure using Google Tag Manager (GTM) and methods for integrating with Google Analytics and AdSense.
Adding Microsoft Clarity in Bing Webmaster Tools
By using Bing Webmaster Tools, you can introduce Microsoft Clarity to visualize user behavior and leverage heatmaps and session recordings.
Clarity Addition Steps
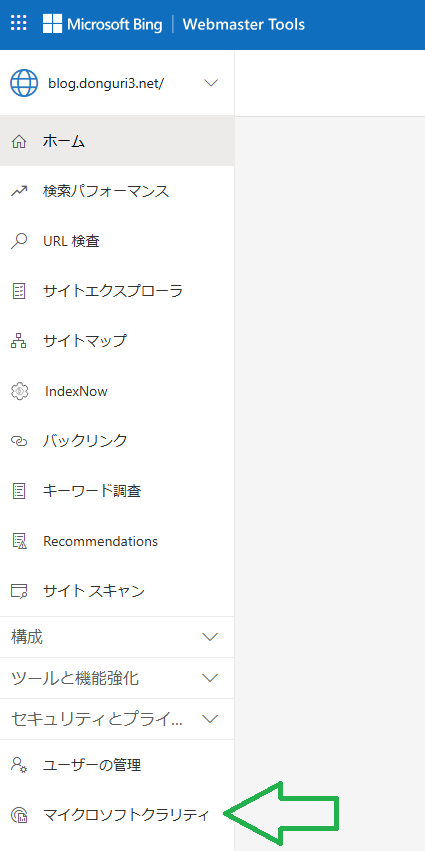
- Access Microsoft Webmaster Tools and select Microsoft Clarity

- Click the “Create new project" button and enter your site information (site name and URL).
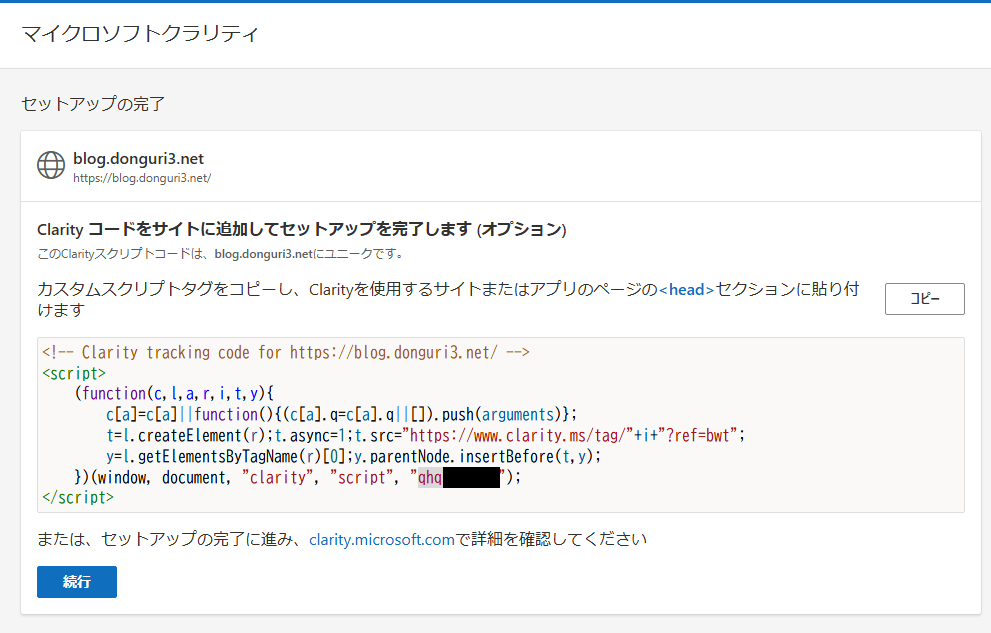
- Once creation is complete, a screen stating “Add Clarity code to your site to complete setup" will appear.
- The displayed code contains a “Project ID", so copy it.

2. Microsoft Clarity Settings in WordPress (Cocoon)
If you are using Cocoon, you can configure the Clarity Project ID directly.
Clarity Integration Steps via Cocoon Settings
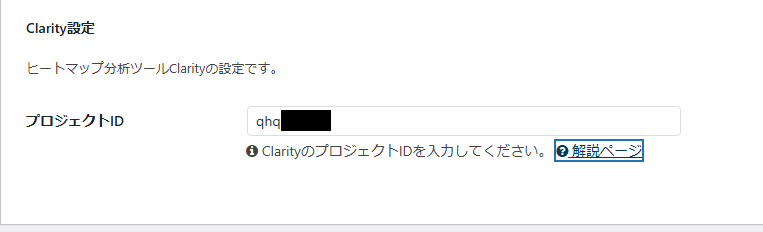
- Log in to the WordPress dashboard and navigate to “Cocoon Settings".
- Open the “Analytics and Authentication" tab.
- Paste the copied Project ID into the Clarity settings field.

- Save the settings.
3. Implementing Clarity Using Google Tag Manager (GTM)
You can also use Google Tag Manager (GTM) as a method to implement Clarity.
Clarity Setup Steps via GTM
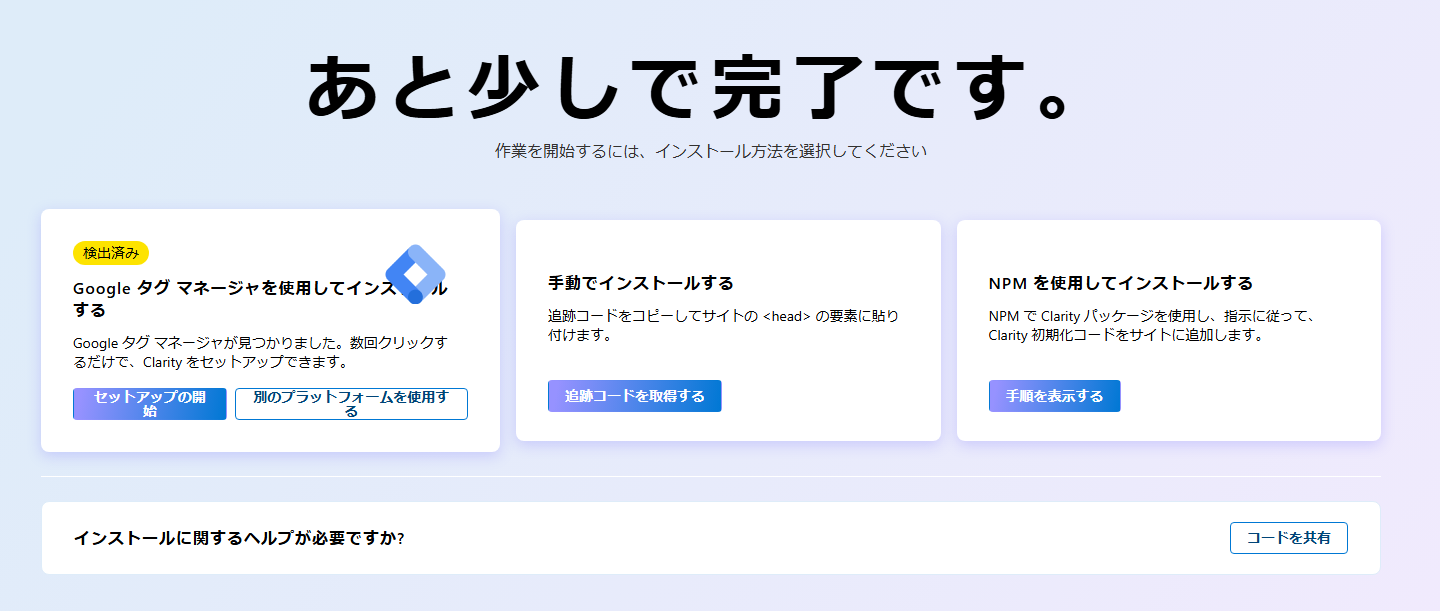
- Select “Install using Google Tag Manager" on the Clarity setup screen.

- Request integration with your Google Tag Manager account.
- Select the GTM account and container where you want to set up Clarity.

- Add the tag using GTM and complete the installation.
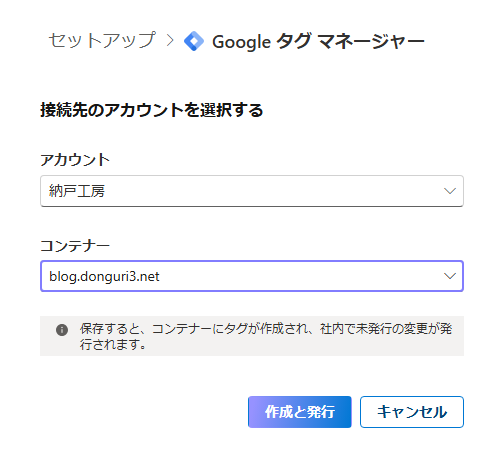
Note: If you are not using GTM, you can also choose to manually add the code to WordPress’s
header.php.
4. Clarity Setup and Integration with Google Services
Once Clarity setup is complete, you can also integrate it with Google services.
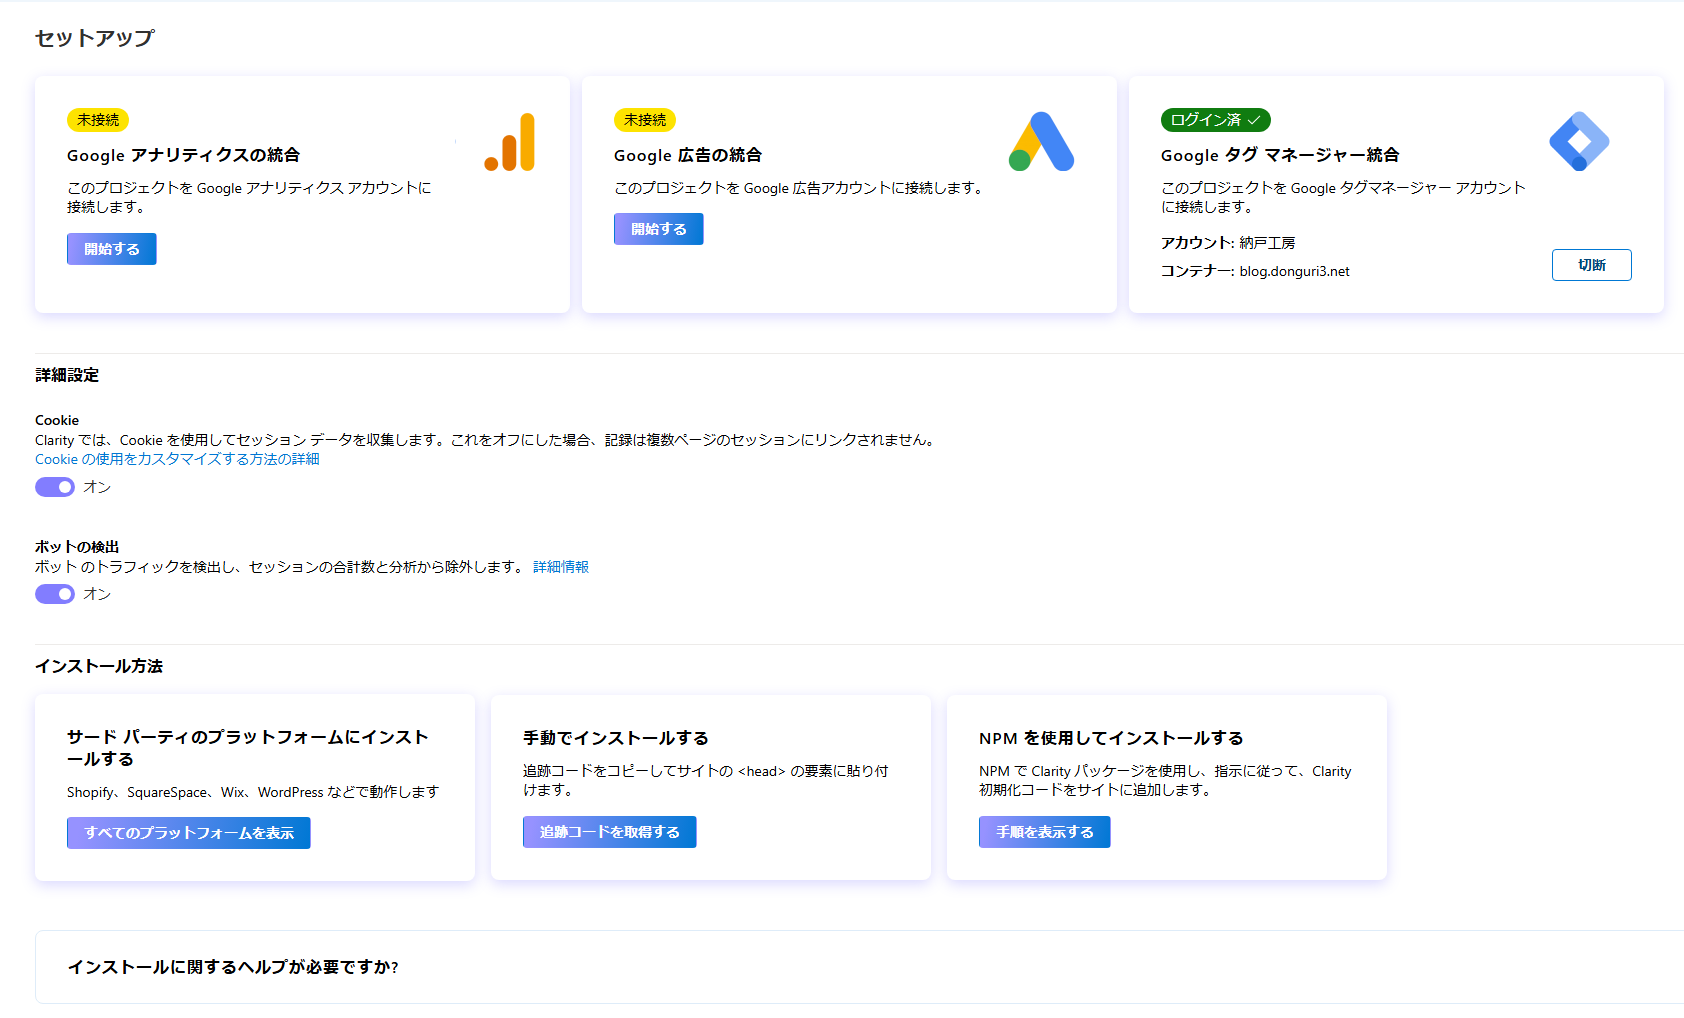
Integration with Google Analytics
- Click the “Start Google Analytics integration" button from the Clarity dashboard.
- Log in to your Google account and select the target Google Analytics property.
- Link Clarity and Google Analytics.
Integration with Google AdSense
- Select “Start Google AdSense integration" on the Clarity dashboard.
- Log in to your Google account and connect your AdSense account.
- Important Note: Integration cannot be completed unless your AdSense application has been approved.
5. Viewing Clarity Data
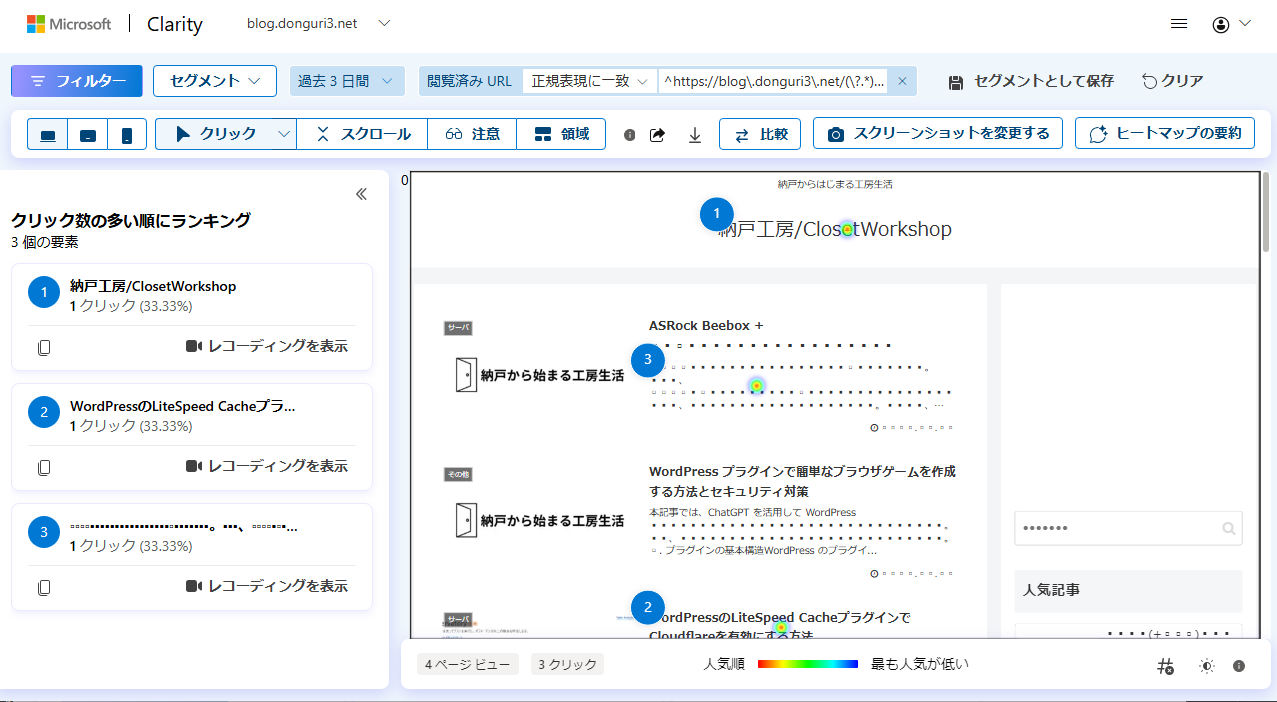
Once Clarity is configured and data starts collecting, you will be able to view the following information:
- Heatmaps: Visually check where users clicked.

- Session Recordings: Review actual user operations via video recordings.
- Scrollmaps: Analyze how far down the page users are scrolling.
Summary
By leveraging Microsoft Clarity, you can improve your site’s usability and gain a detailed understanding of visitor behavior. Especially when using the Cocoon theme, it can be easily implemented simply by pasting the Project ID, so we highly recommend giving it a try.