Installing and Configuring the WordPress Plugin “Converter for Media” (with Cloudflare Integration)
Here is how to install the “Converter for Media" plugin, which improves site performance by converting WordPress media files into WebP or AVIF formats, and integrate it with Cloudflare. This article provides a detailed explanation of settings that leverage the Cloudflare API to properly manage CDN caching.
Overview of Converter for Media
Converter for Media is a plugin that improves page load speeds by compressing WordPress images into lightweight formats (WebP and AVIF).
Benefits
- Faster site speeds through image compression
- Reduced effort with automatic conversion features
- Support for WebP / AVIF conversion
- Cache management through Cloudflare integration
Installing the Plugin
- Log in to your WordPress dashboard
- Go to “Plugins" > “Add New"
- Search for “Converter for Media"
- Click “Install Now" > “Activate"
Steps to Create a Cloudflare API Token
Converter for Media allows you to control the cache using the Cloudflare API. Follow the steps below to create an API token.
Creating an API Token
- Log in to the Cloudflare dashboard
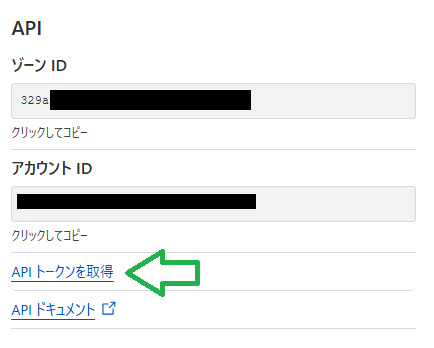
- Select the target domain > Select “Get your API token" at the bottom right.
Note that the Zone ID will be required for the Converter for Media plugin settings.

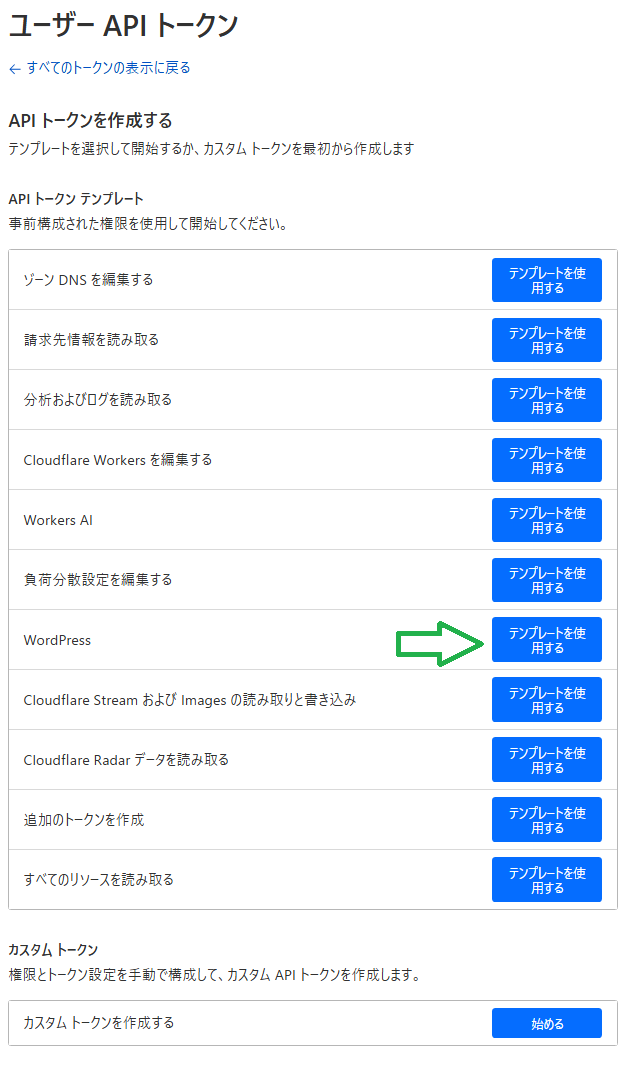
- Select “Create Token"
- Select the WordPress template under user API tokens

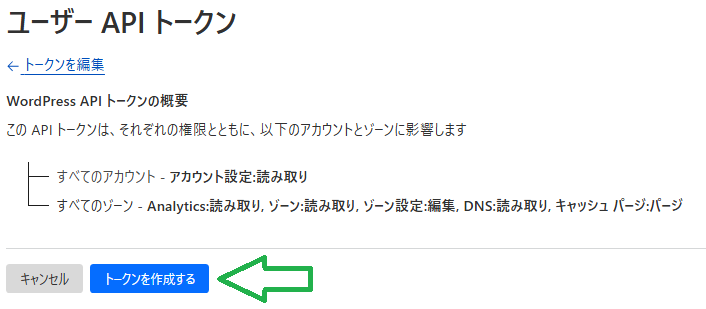
- Rename the token to something recognizable and click “Create Token"

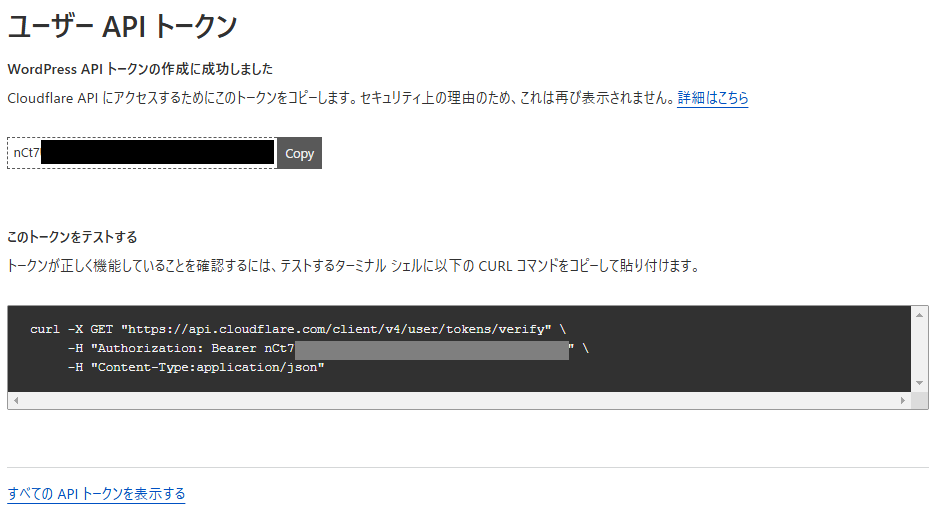
- Create the token and copy the displayed API key

*Note: If you forget the API key, you will need to recreate it.
Configuring Converter for Media (Cloudflare Integration)
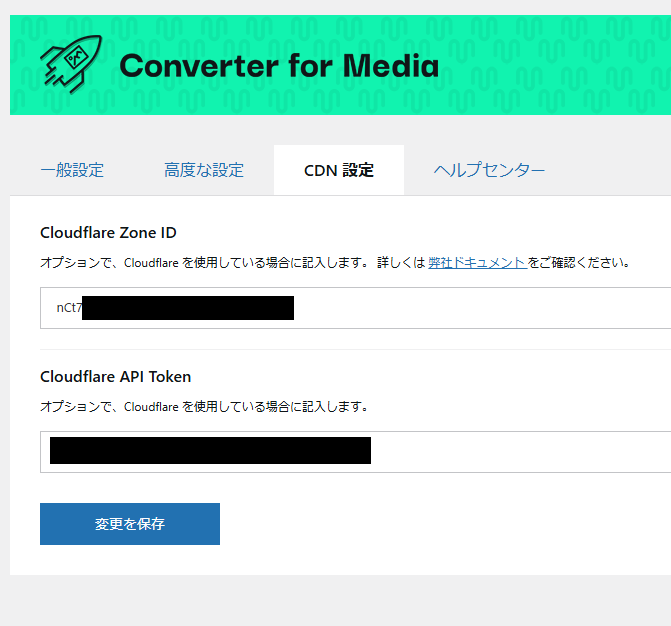
- Go to WordPress “Settings" > “Converter for Media"
- Open the “CDN Settings" tab
- Enter the Zone ID from the Cloudflare token retrieval page into the Cloudflare Zone ID field, and enter the API token you just created into the Cloudflare API Token field

- Save settings
Web Server Configuration
If Rewrites do not work, configure your web server settings.
In OpenLiteSpeed, a restart is required after configuring the Converter for Media plugin.
Check here for other web servers.
5. Operation Check and Optimization
Running the Conversion
- After configuring, run bulk image optimization at the bottom of the General Settings tab to verify that images in the media library have been converted to WebP/AVIF.
- Measure page load speeds using Google PageSpeed Insights or GTmetrix.
Checking Cloudflare Cache
- Check the cache status on the Cloudflare dashboard.
- Verify whether changes are reflected using your browser’s developer tools.
6. Troubleshooting
- Images are not converted: Review your image format settings.
- Cache is not cleared: Re-verify the Cloudflare API token permissions.
- Display glitches: Check your CDN settings, as image URLs may have changed.
Conclusion
By integrating Converter for Media with Cloudflare, you can automate image optimization and cache management, thereby boosting your WordPress site’s performance. Configure the Cloudflare API properly and aim for a smooth and fast site operation!