Automating PCB Design with Generative AI (Gemini/Antigravity) and KiCad
On a certain YouTube channel, a review of semi-automated circuit design using EasyEDA and generative AI was recently showcased. Witnessing the ongoing shift toward AI integration in cloud-based EDA environments inspired me to explore whether a similar level of automation could be achieved in "KiCad," the open-source EDA tool I routinely rely on in my local environment.
To enable AI to directly operate tools within a local setup, I utilized the "MCP (Model Context Protocol)" proposed by Anthropic. By having an LLM such as Gemini invoke KiCad’s internal APIs via an MCP server, the goal is to build a streamlined automation pipeline ranging from natural language prompt instructions to schematic creation, PCB layout, and fabrication data export.
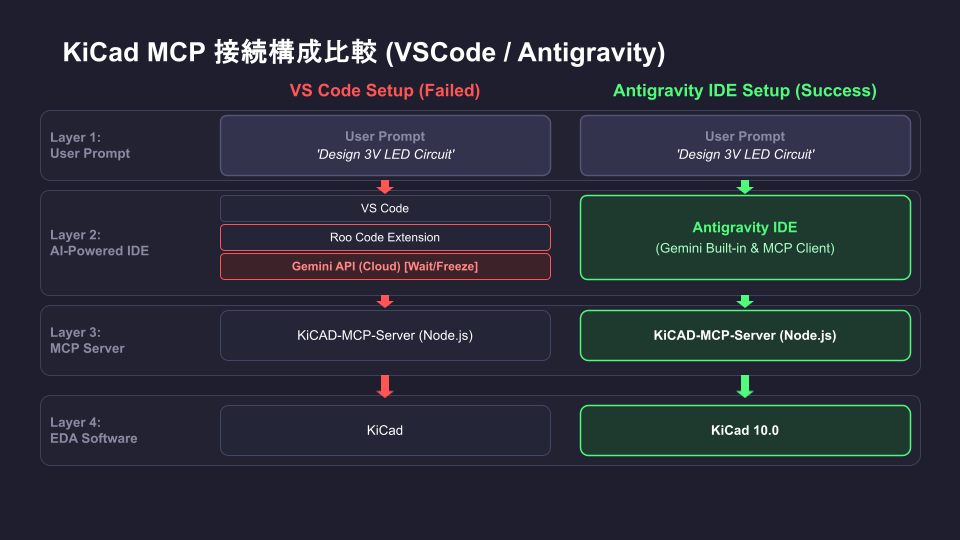
Failure with the VSCode Configuration and Migration to Antigravity IDE
Initially, I began testing by combining VSCode—a development environment I am very familiar with—with the Roo Code extension to integrate the Gemini API, KiCAD-MCP-SERVER, and KiCad (VSCode + Roo Code + Gemini API + KiCAD-MCP-SERVER + KiCad).
However, with this setup, the process halted right at the stage of sending a request to the Gemini API and froze while awaiting a response. This was likely caused by payload bloat due to numerous MCP tool definitions and high client-side processing loads, though I was unable to isolate the exact logs.
Therefore, I decided to completely migrate my Gemini development environment from VSCode to Google’s AI IDE, "Antigravity IDE," and overhaul the entire system architecture.
KiCAD-MCP-Server Installation and Setup Procedure
As a prerequisite for integration into Antigravity IDE, you need to install and build the "KiCAD-MCP-Server"—the MCP server designed to control KiCad—in your local environment.
The repository provides a PowerShell script (setup-windows.ps1) that automates environment setup for Windows. Utilizing this script allows you to complete the setup in one go without having to follow manual build procedures.
However, if multiple versions of KiCad are installed on your system, you must modify the $versions variable around line 85 of setup-windows.ps1 to place the version you wish to use at the very beginning of the array.
By default, version 9.0 is listed first as shown below, so you will need to change it to the head of the array if you want to use the latest version 10.0.
$versions = @("10.0", "9.0", "9.1", <del>"10.0",</del> "8.0")
Launch PowerShell with administrator privileges, navigate to the directory where you cloned the repository, and run the following commands.
Cloning and Setting Up the Repository
cd C:
git clone https://github.com/mixelpixx/KiCAD-MCP-Server.git
cd KiCAD-MCP-Server
Set-ExecutionPolicy -ExecutionPolicy Bypass -Scope Process
.\setup-windows.ps1
Running this script automatically generates the necessary execution file dist\index.js along with the configuration template file windows-mcp-config.json.
Configuring Antigravity IDE and Applying windows-mcp-config.json
The procedure for integrating the MCP server into Antigravity IDE is very straightforward.
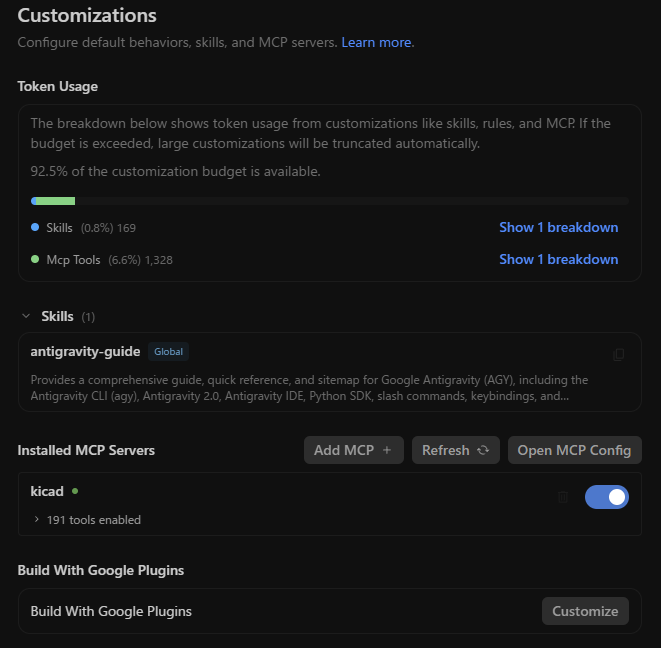
- In the bottom-left corner of Antigravity IDE, select "Settings" > "Customizations" > "Open MCP Config" under Installed MCP Servers.
- This opens the directory containing
mcp_config.jsonin File Explorer. Openmcp_config.jsonusing a text editor like Notepad. - Copy the contents of
windows-mcp-config.json(which was automatically output upon completion ofsetup-windows.ps1), paste them directly intomcp_config.json, and save the file. - Click "Refresh" under Installed MCP Servers in Customizations. Once "kicad" is added and displays a green indicator light, the setup is complete.
The configuration content (example output of windows-mcp-config.json) is as follows:
{
  "mcpServers": {
    "kicad": {
      "command": "node",
      "args": [
        "C:\KiCAD-MCP-Server\dist\index.js"
      ],
      "env": {
        "PYTHONPATH": "C:\\Program Files\\KiCad\\10.0\\lib\\python3\\dist-packages",
        "KICAD_AUTO_LAUNCH": "true",
        "LOG_LEVEL": "info"
      }
    }
  }
}
There is no need to manually construct complex execution paths or environment variables; simply pasting the generated JSON sets up the integration environment with KiCad 10.0. Regarding MCP connection specifications and environment variable handling in Antigravity IDE, I referred to the following official documentation:
Antigravity IDE Documentation – MCP
Google Cloud Documentation – Use MCP servers
Execution via Natural Language Prompt and Results
Once the environment setup was complete, I executed the following prompt instruction from the Antigravity IDE prompt field:
Please create a circuit for a battery (3V) and an LED (5mm).
Assume implementation using single-sided copper-clad board.
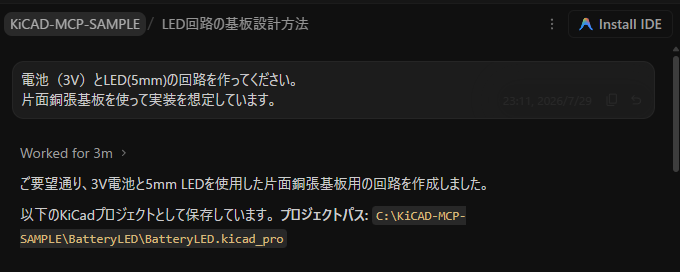
The Gemini agent autonomously invoked the MCP server tools, automatically generating the following deliverables all at once without requiring manual GUI intervention:
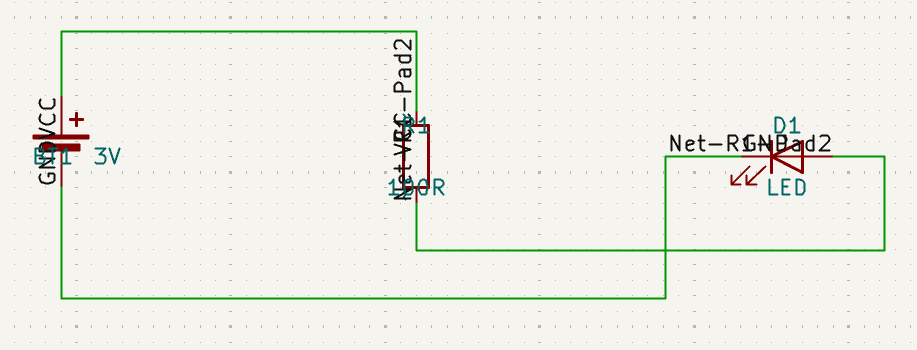
- Schematic (.kicad_sch): Automatically placed a CR2032 coin cell battery holder (BT1), 100Ω resistor (R1), and 5mm LED (D1), connecting the nets properly.
- PCB Layout (.kicad_pcb): Placed components within a 40mm × 45mm board outline, applying extra-thick 2.56mm traces on the bottom layer (B.Cu). Since the LED orientation was reversed and traces crossed, it rotated the component to avoid intersection and placed a solid GND fill across the board.
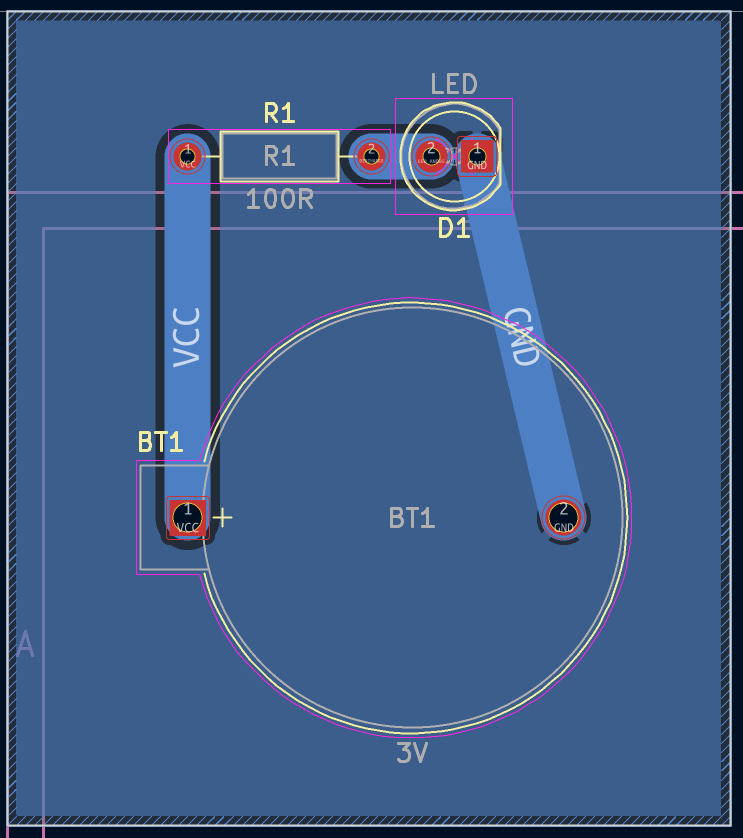
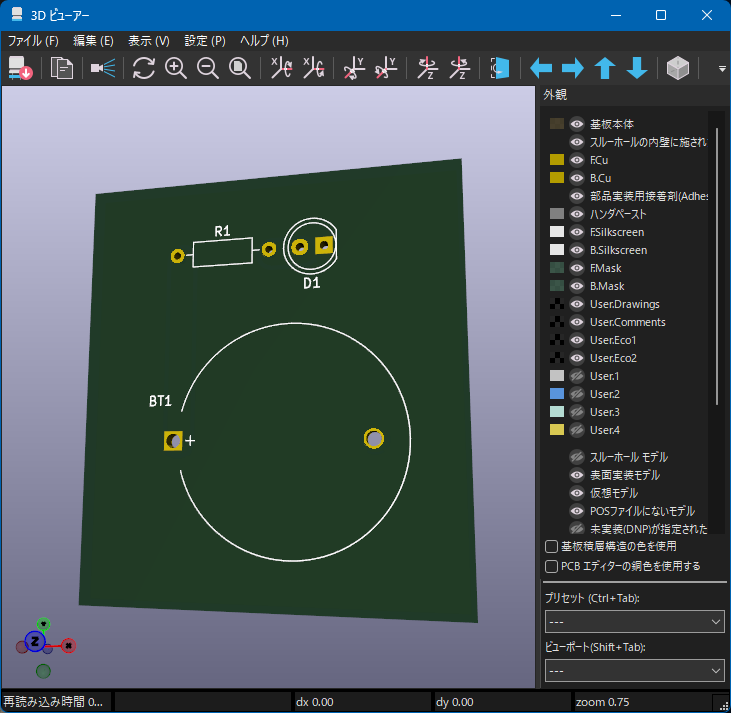
- CNC Machining Data: Exported the bottom layer pattern (BatteryLED-B_Cu.gbl), board outline cut (BatteryLED-Edge_Cuts.gm1), and drill files (BatteryLED.drl) to the designated folder.
Within a short time after inputting the prompt, a complete set of files ready to be loaded directly into CAM software was generated. This successfully confirmed the practicality of an environment that directly controls local EDA using generative AI.
 https://amzn.to/4yW32u2
Conclusion
Inspired by a YouTube video, I tested automated KiCad PCB design using Gemini by combining Antigravity IDE and KiCAD-MCP-SERVER. To resolve the freezing issues experienced in the VSCode environment, I migrated to Antigravity IDE to simplify the architecture. Environment setup was completed simply by modifying and running setup-windows.ps1, then applying the resulting windows-mcp-config.json to mcp_config.json via Antigravity’s settings menu (Settings > Customizations > Open MCP Config). Through prompt instructions alone, I fully automated everything from schematic creation and PCB layout—including extra-thick 2.56mm traces and solid GND fills—to Gerber outputs for CNC machining.